Configuring EC2 and Connecting to S3
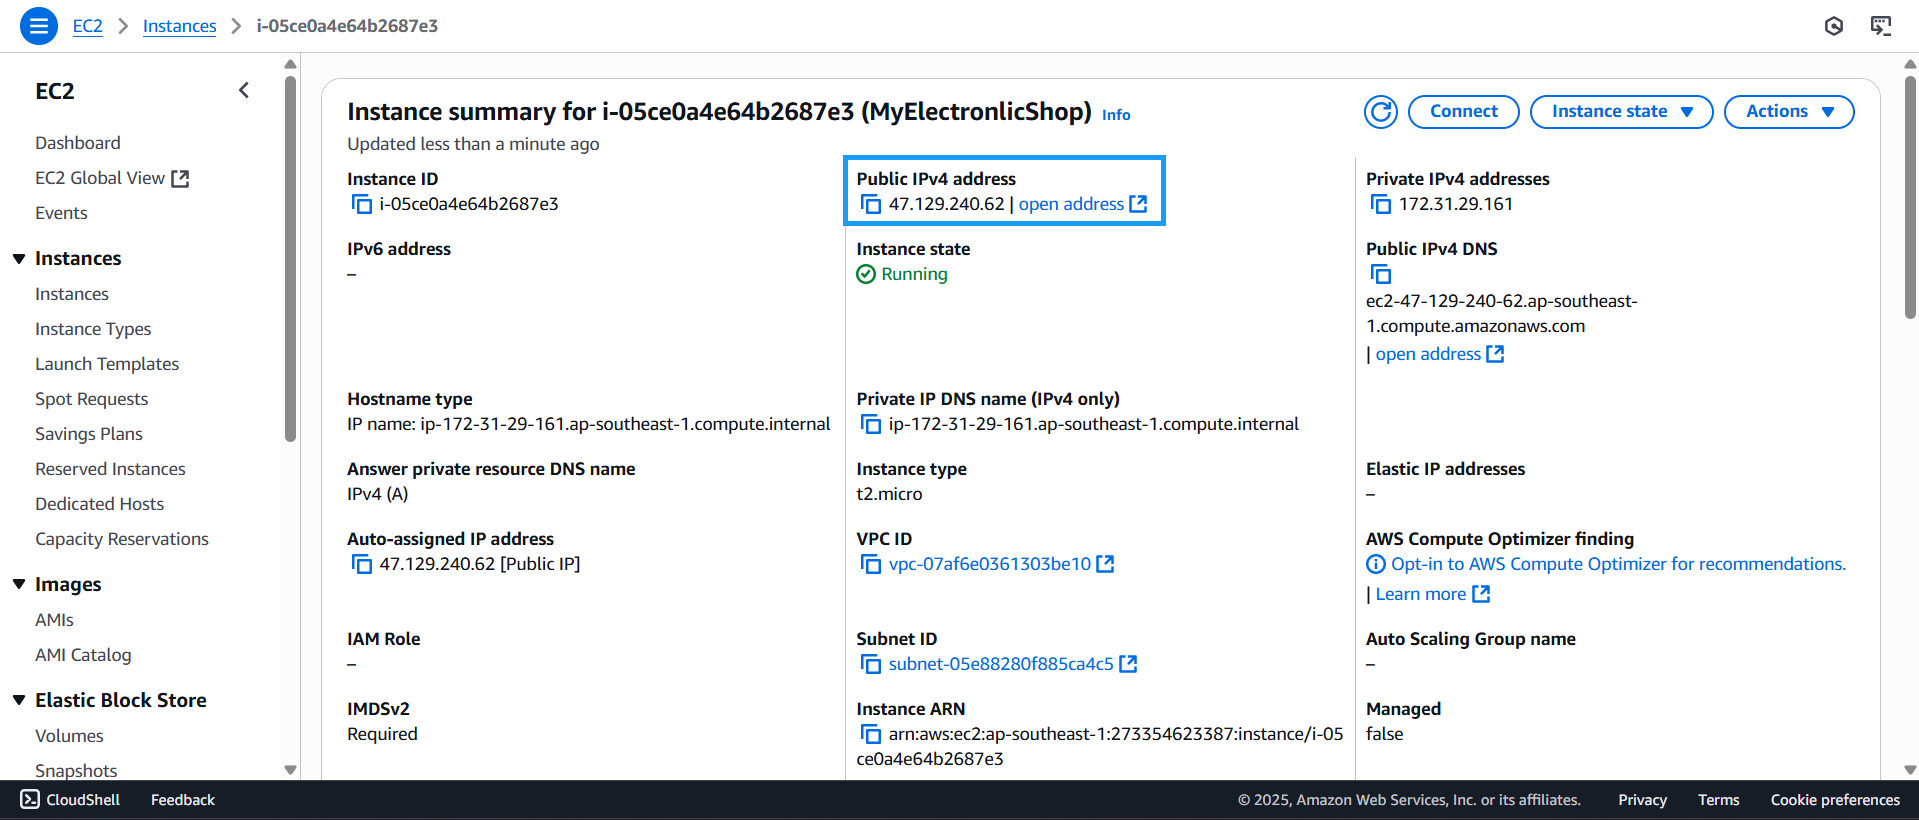
- Access the created EC2 instance and click Copy the Public IPv4 address
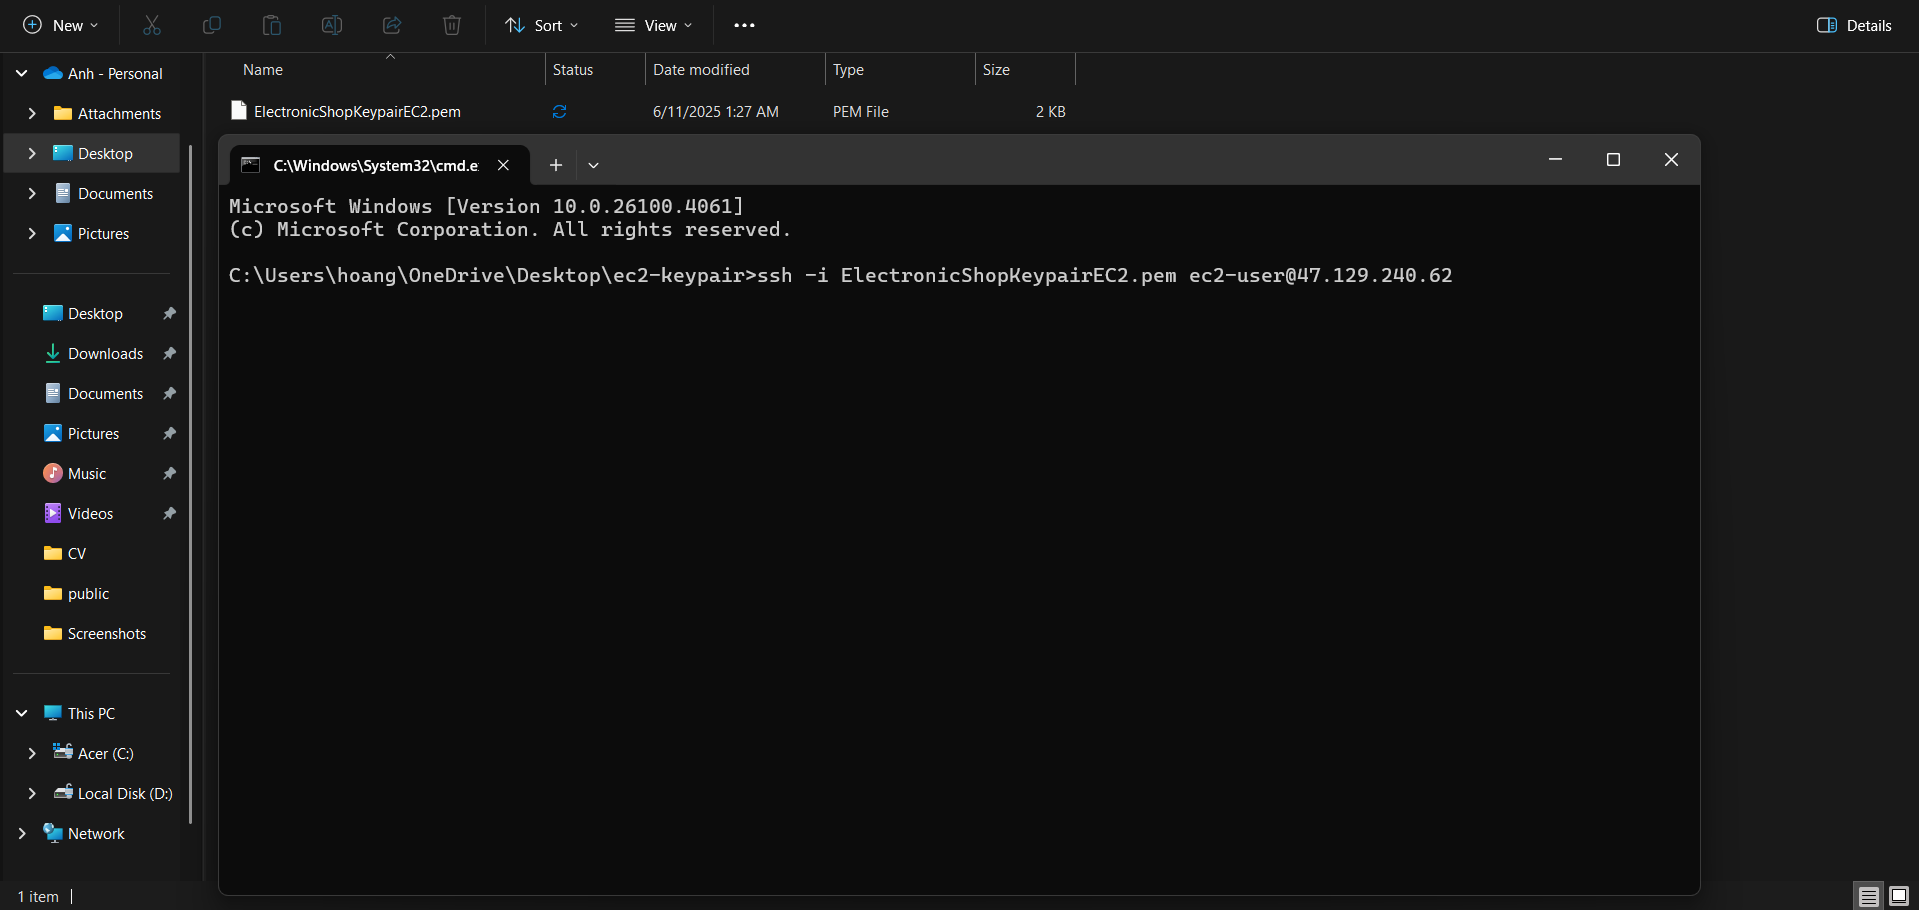
- Open CMD, navigate to the directory containing the EC2 keypair, and execute the following code to SSH into the EC2 instance:
ssh -i "your-keypair.pem" ec2-user@<EC2-PUBLIC-IP>
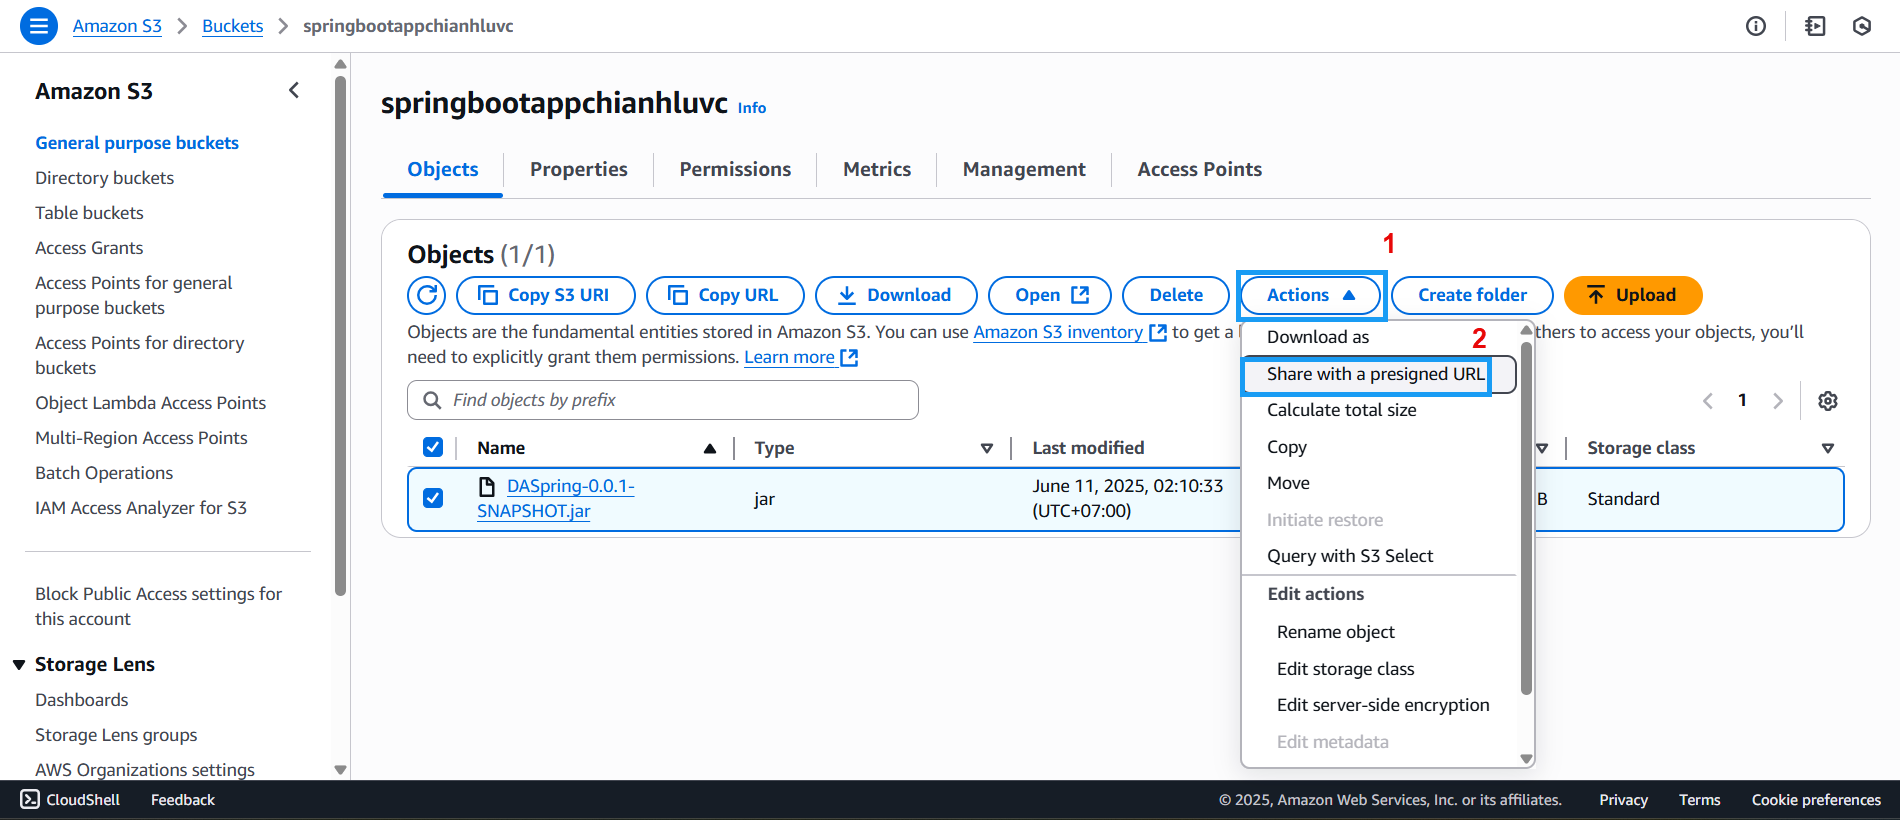
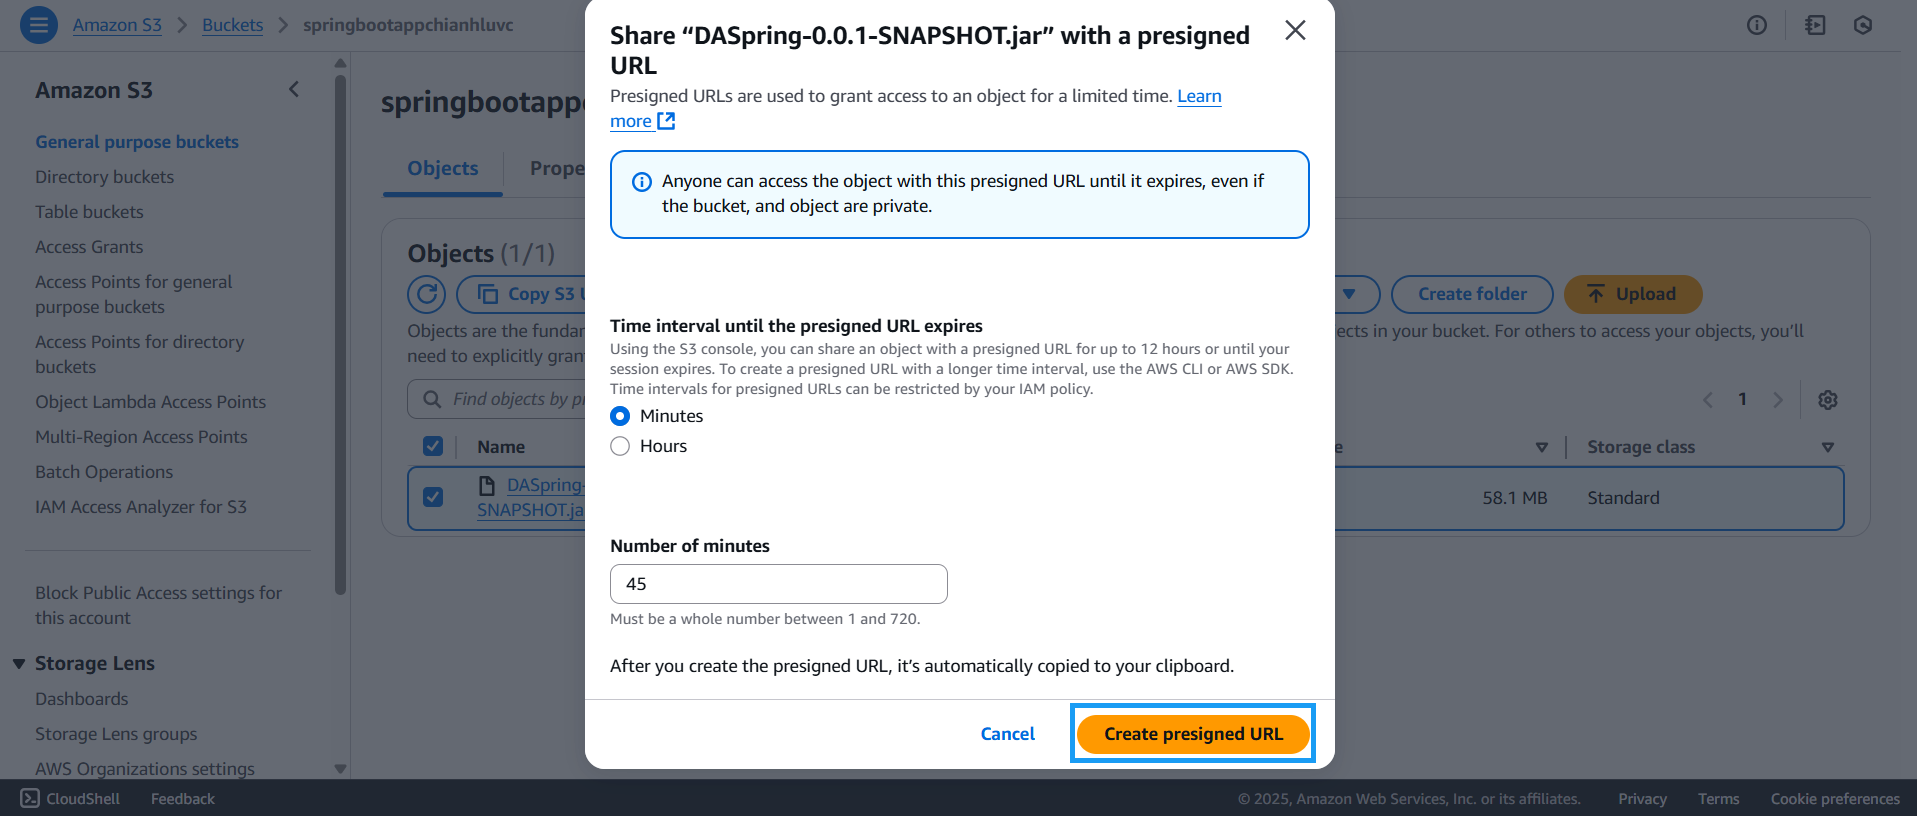
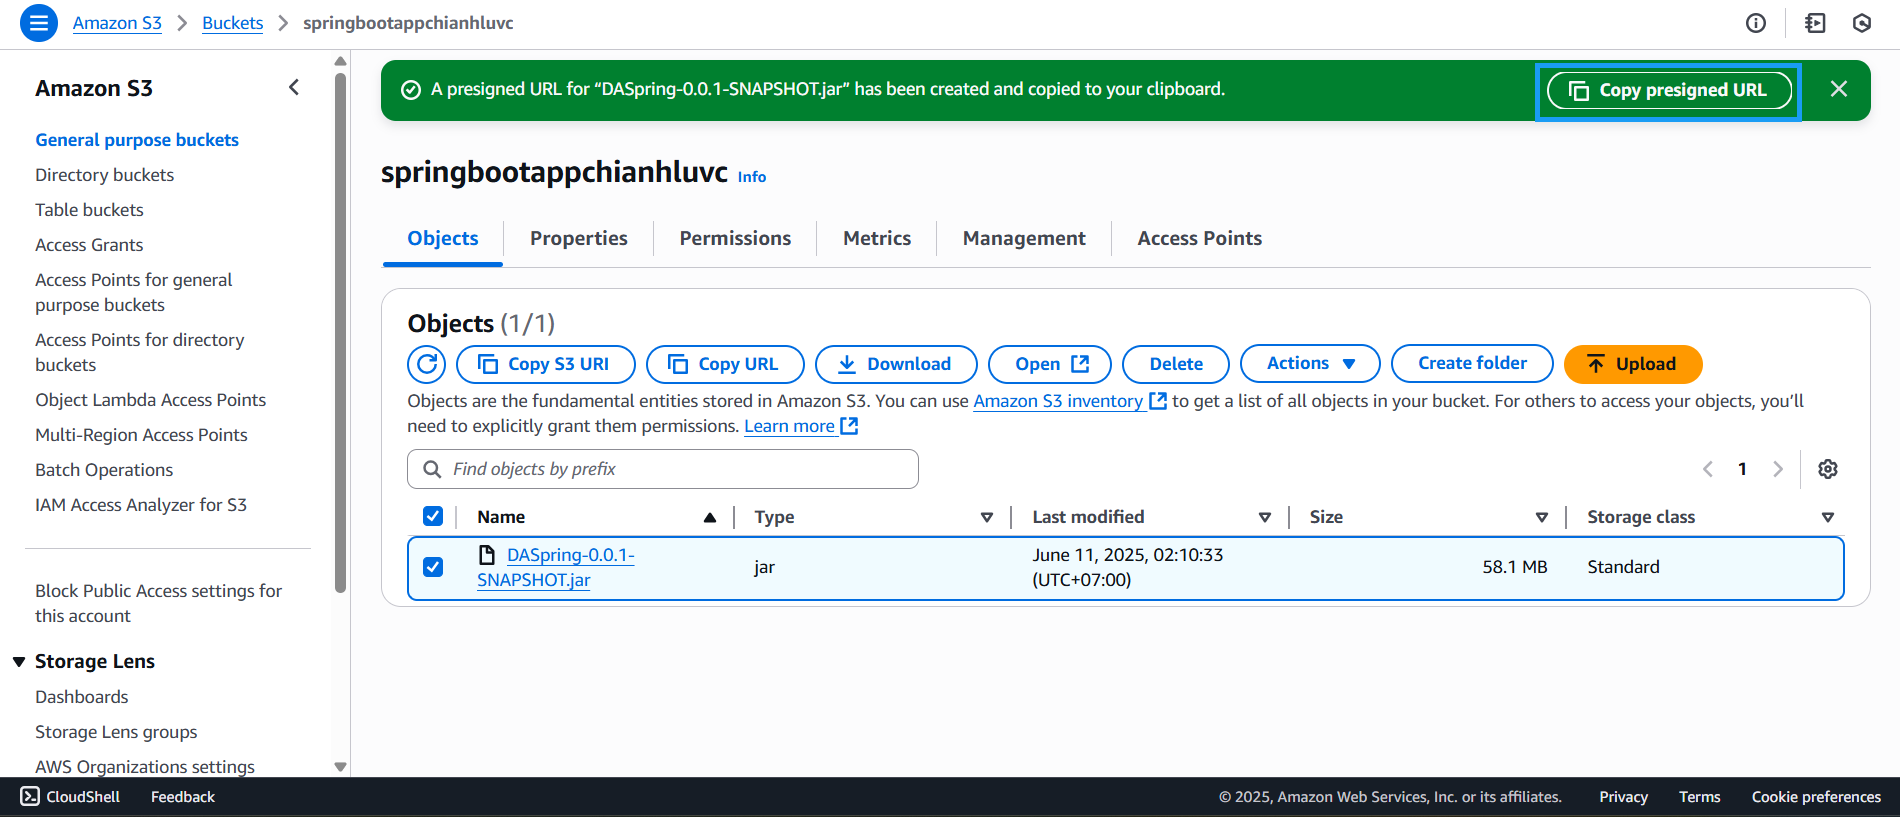
Copy the S3 object URL of the uploaded JAR file
Configure the file path
- Click the Copy icon to copy the path
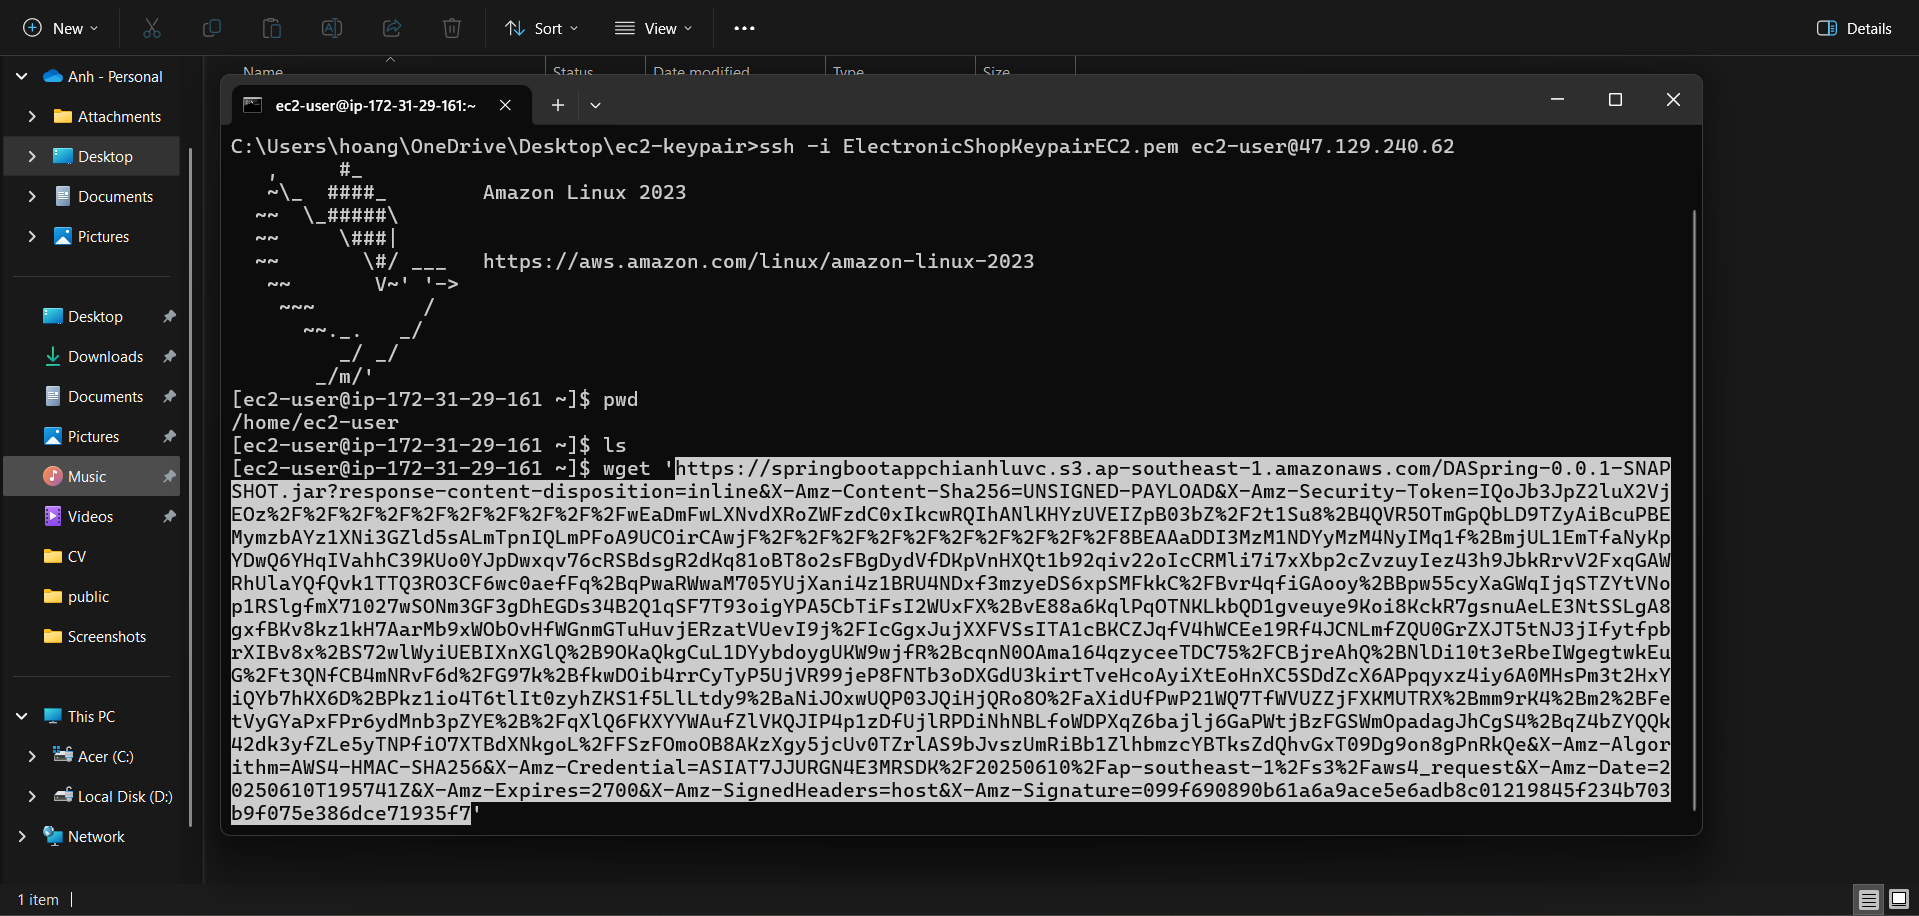
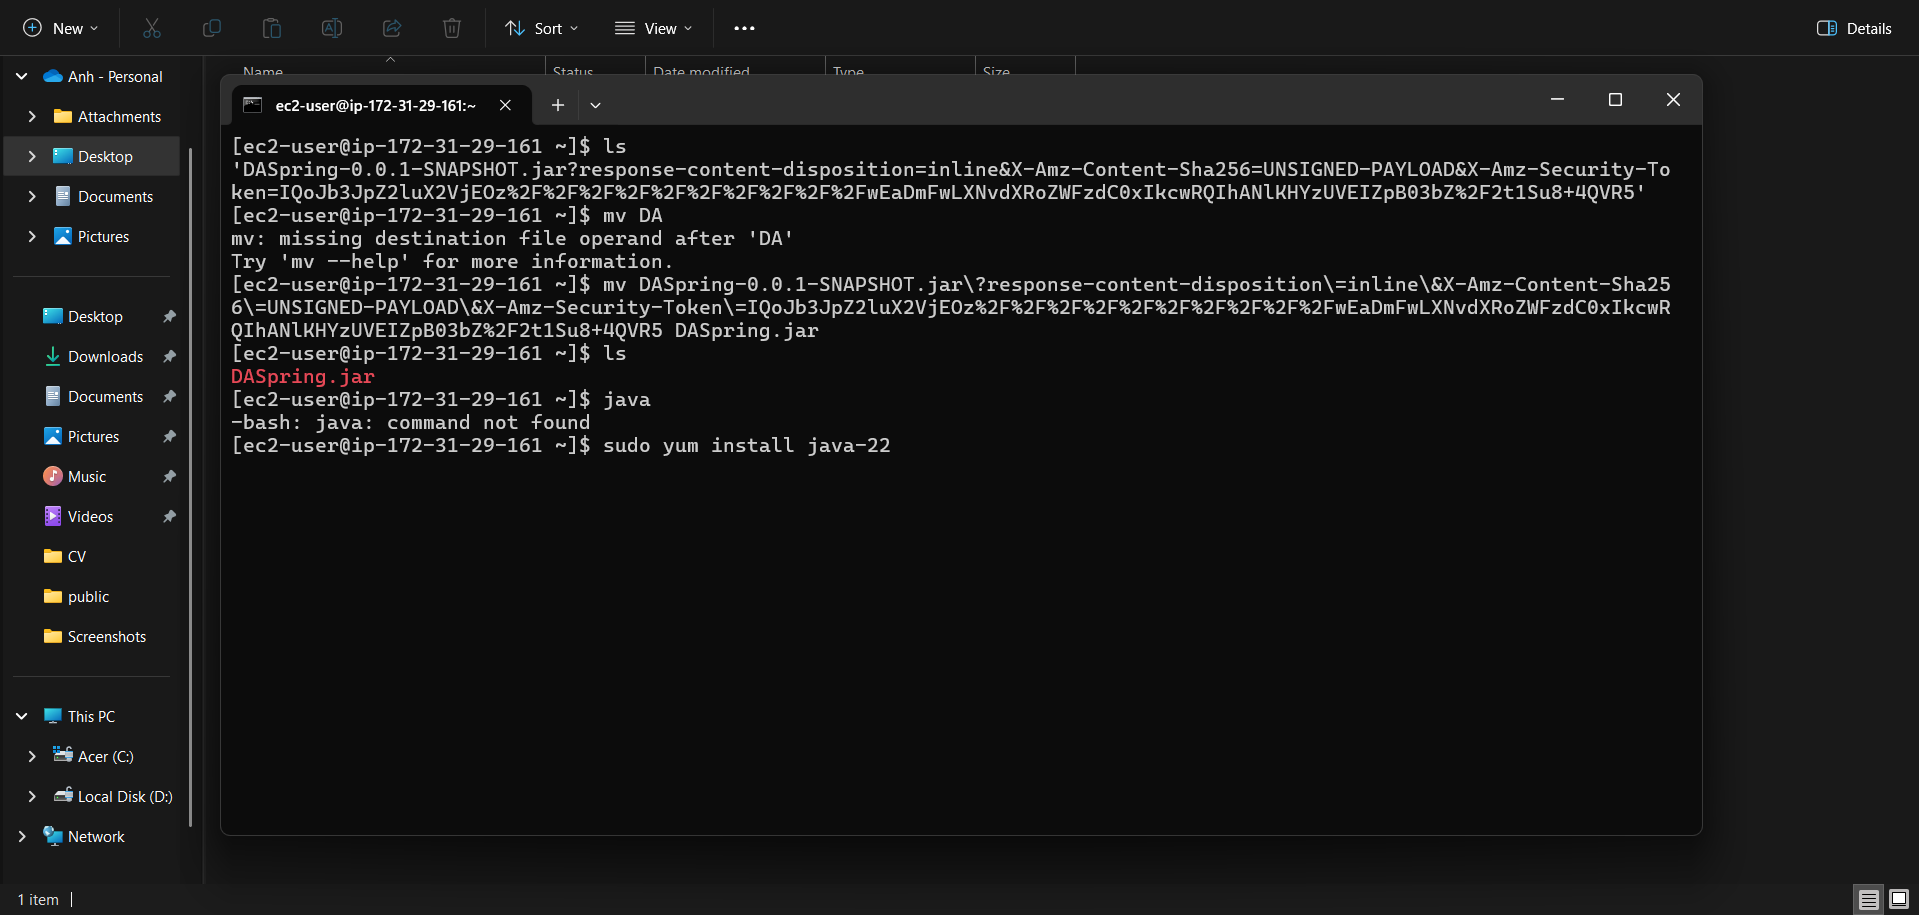
- Enter the command below to download the JAR file from S3 to EC2
pwd 'links3'
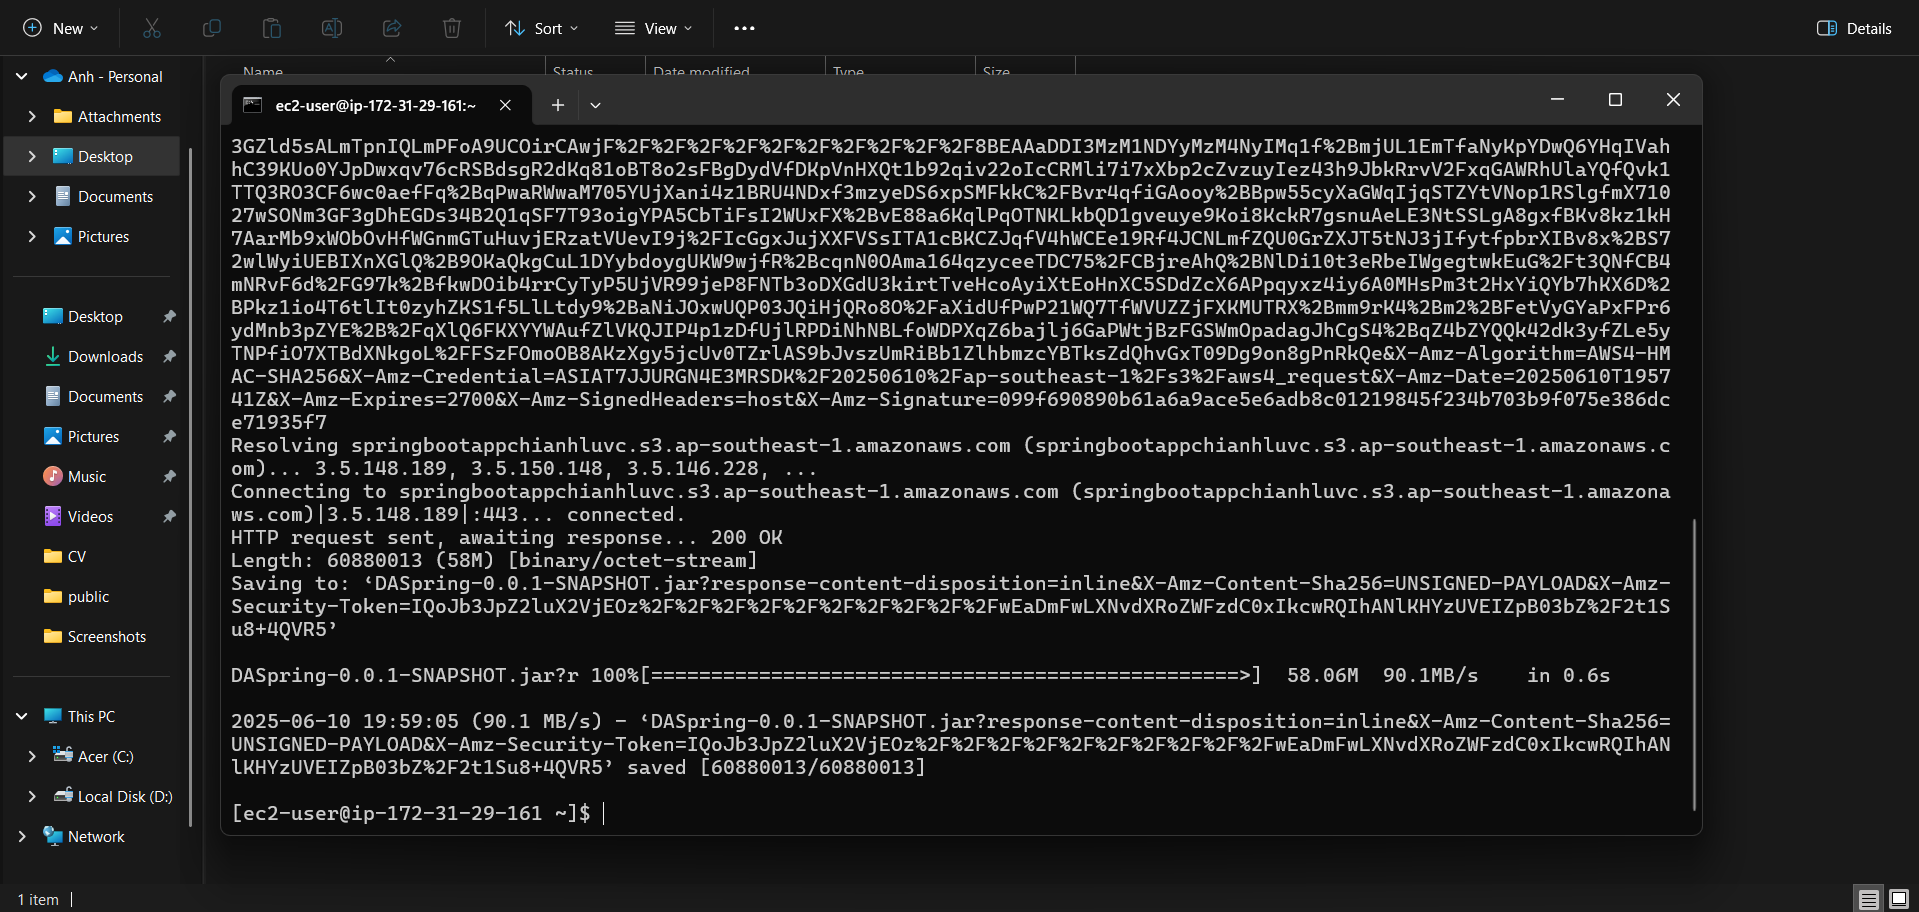
- Wait for the download to complete. A 100% progress notification will appear in CMD
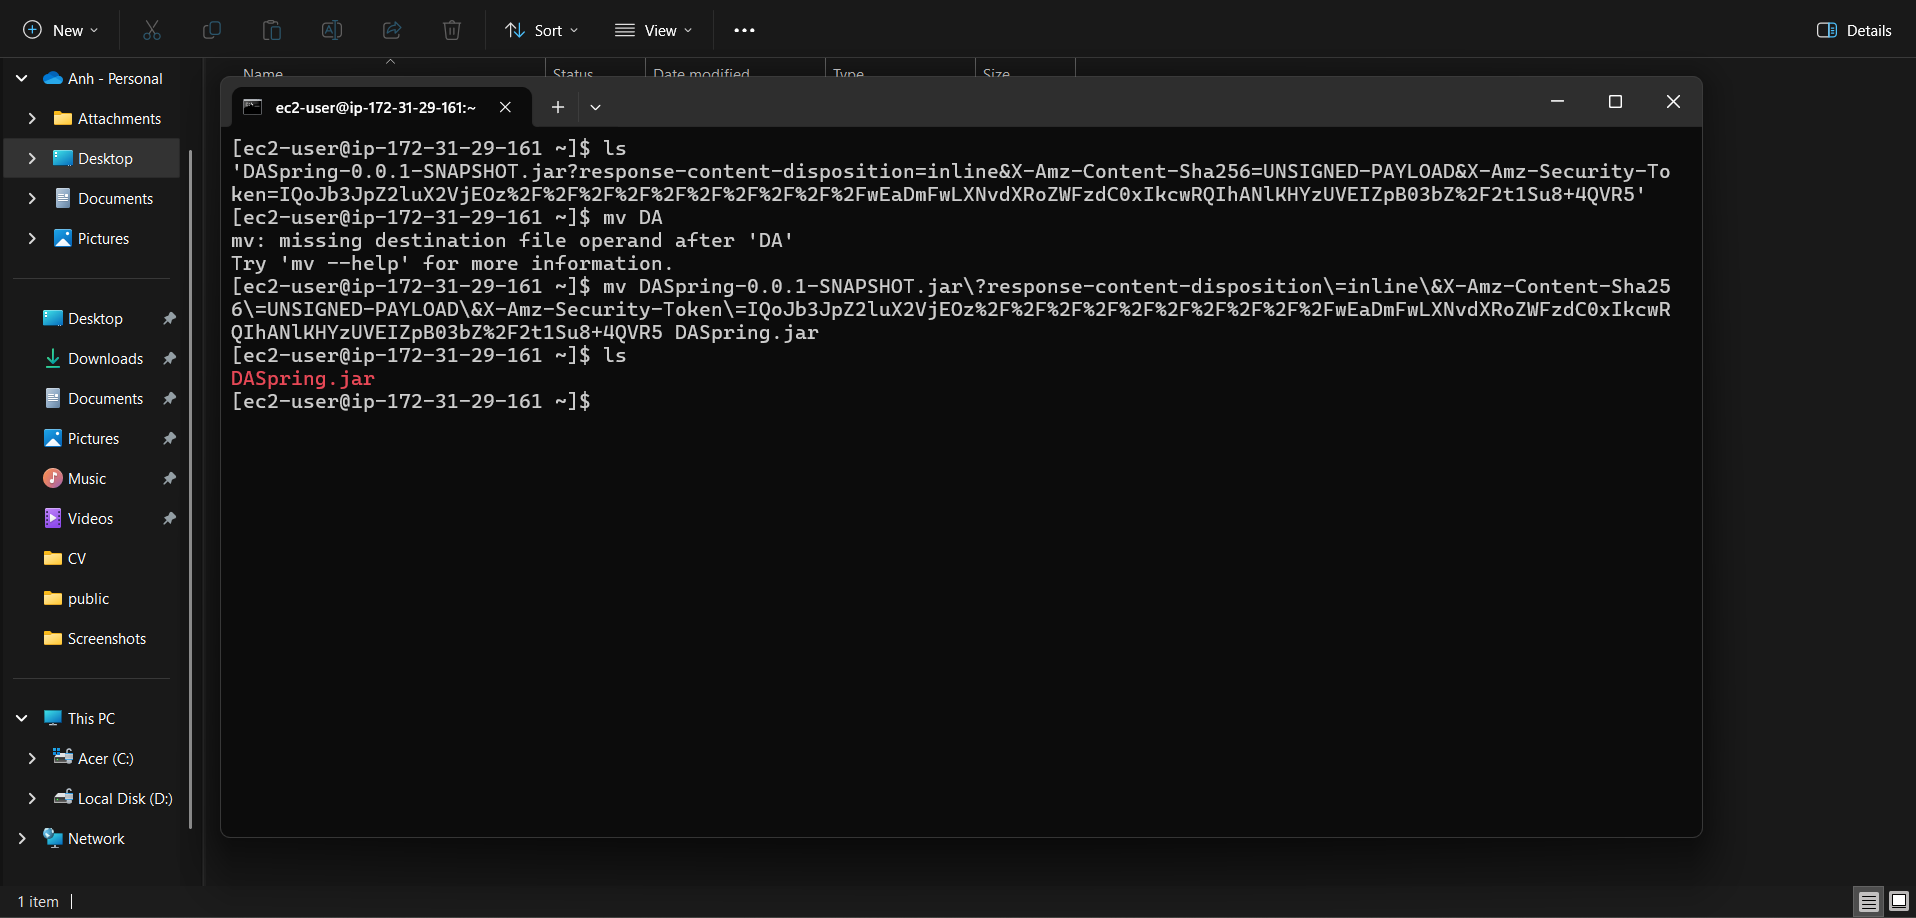
- Run the following command to rename the file
mv 'namefile' newName
ls
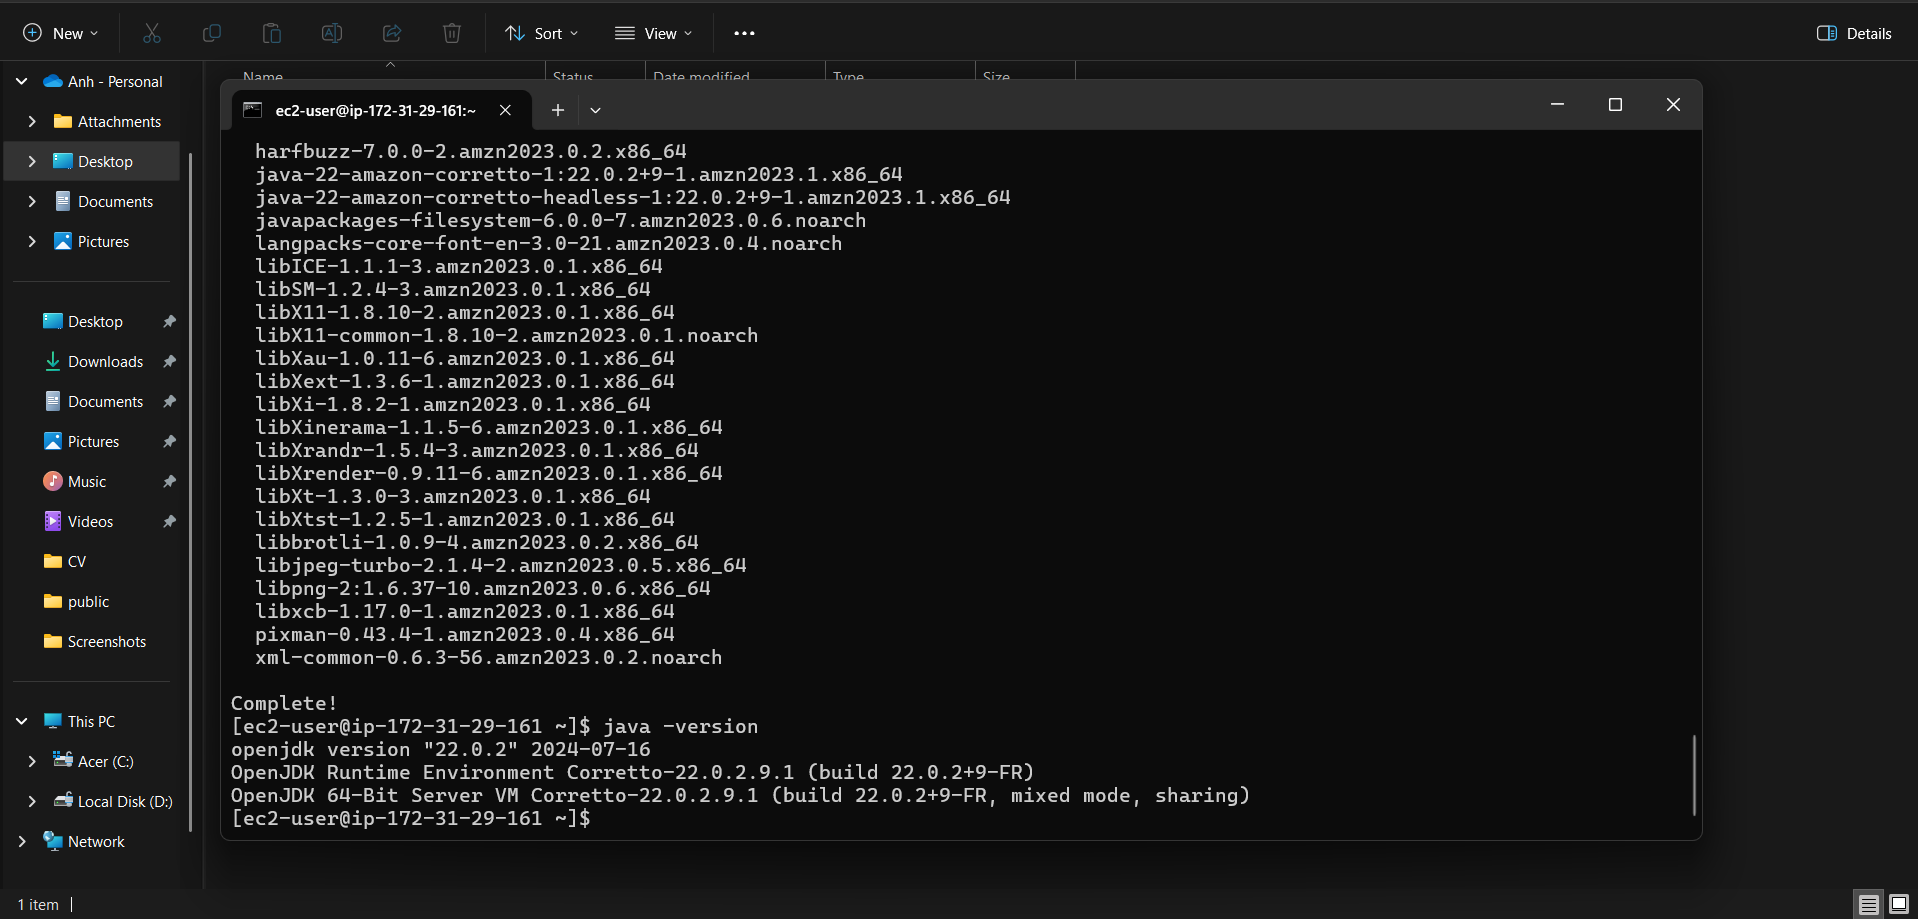
- Install Java 22 using the command below
sudo yum install java-22
ls
- Wait for Java 22 to be installed on the EC2 instance
- Proceed with the following steps to run the web application
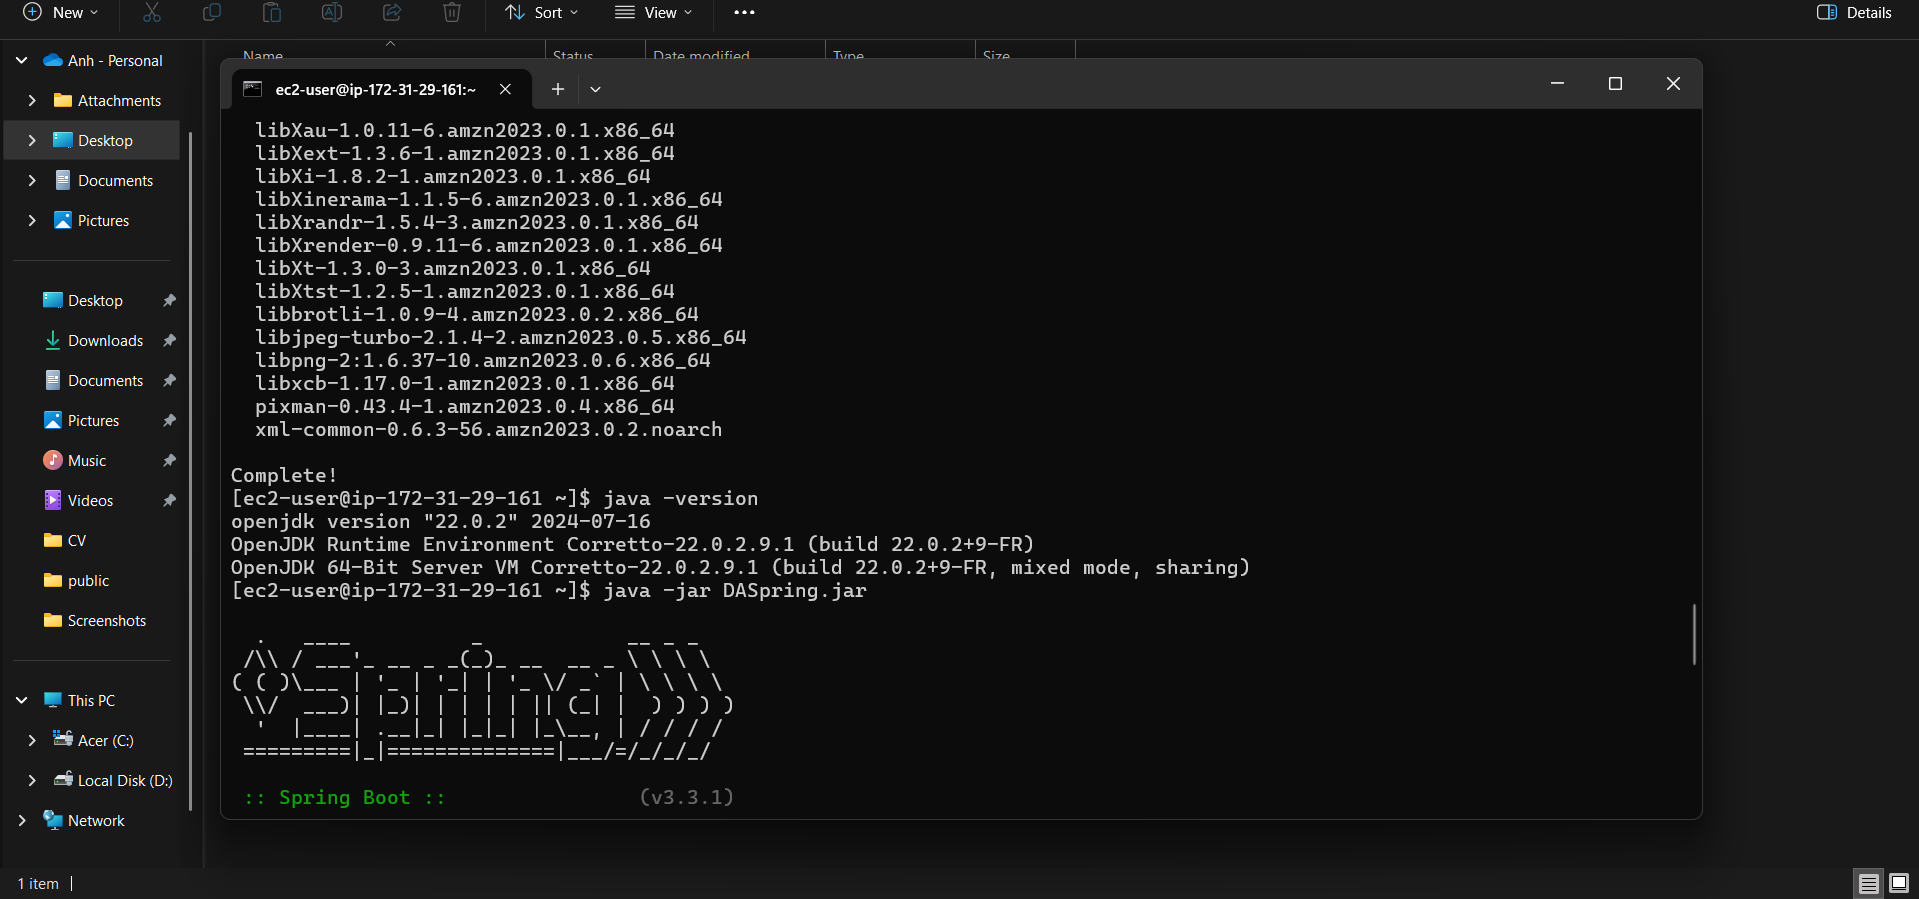
- Verify the Java version
- Launch the application
java -version
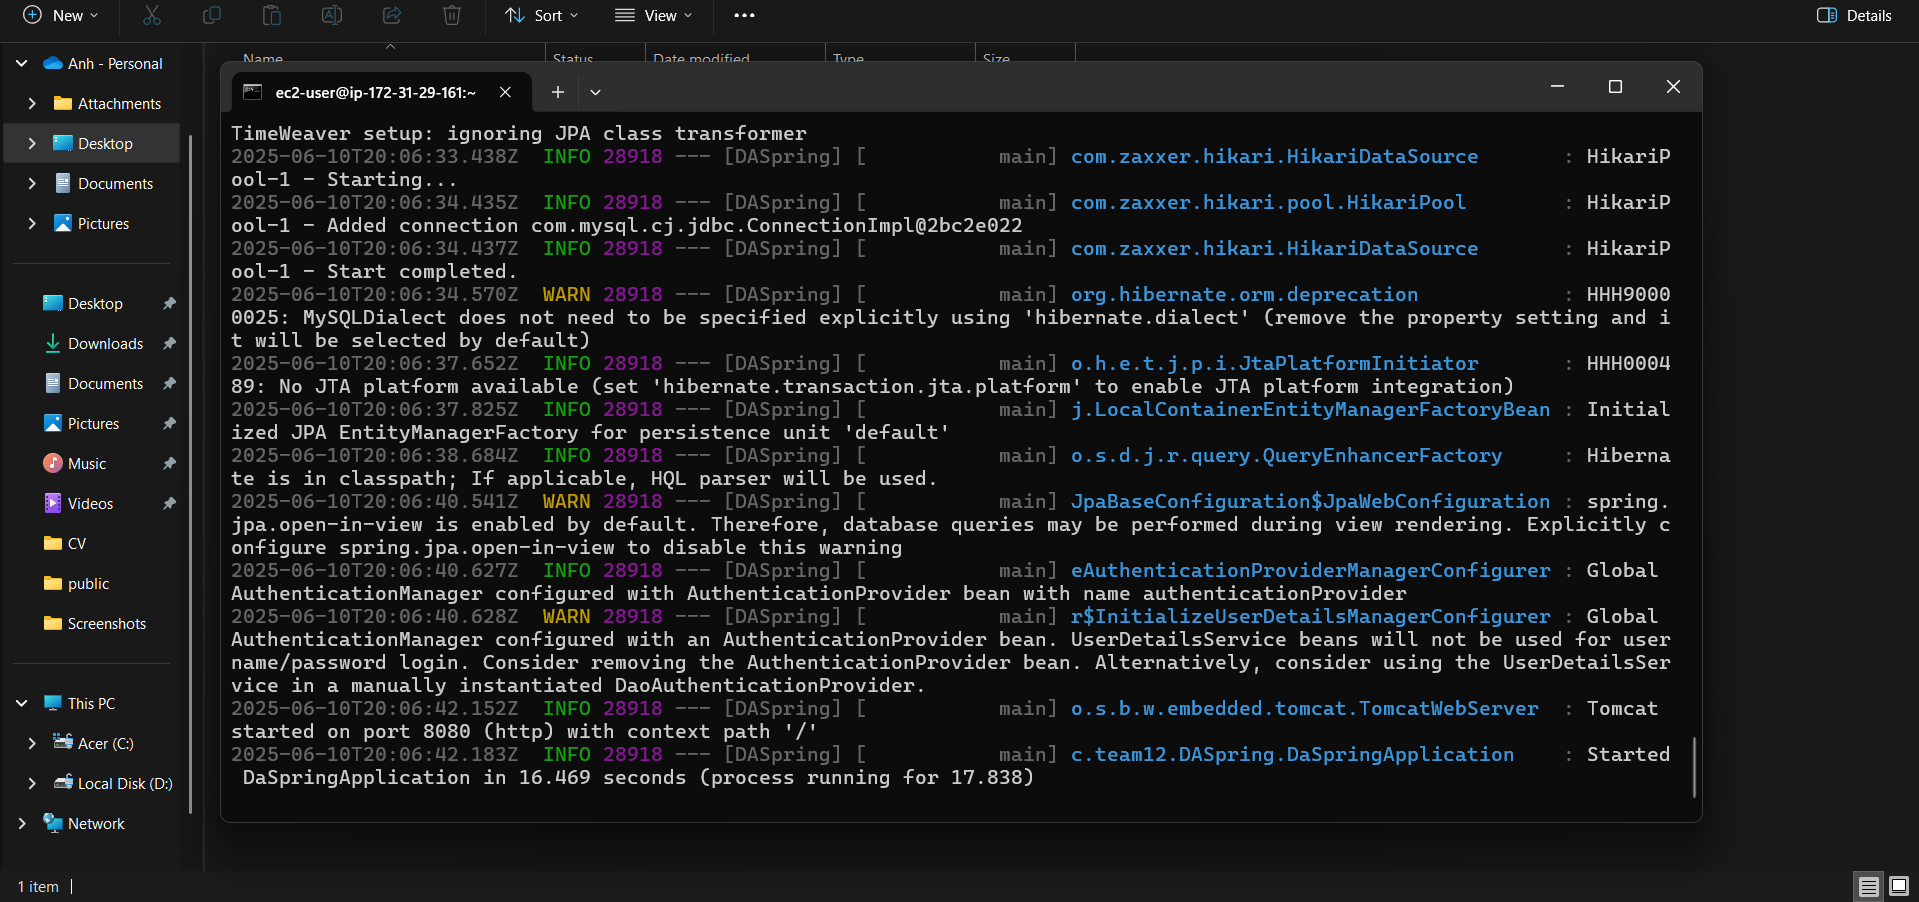
java -jar DASpring.jar
ls
- Check the running application’s details
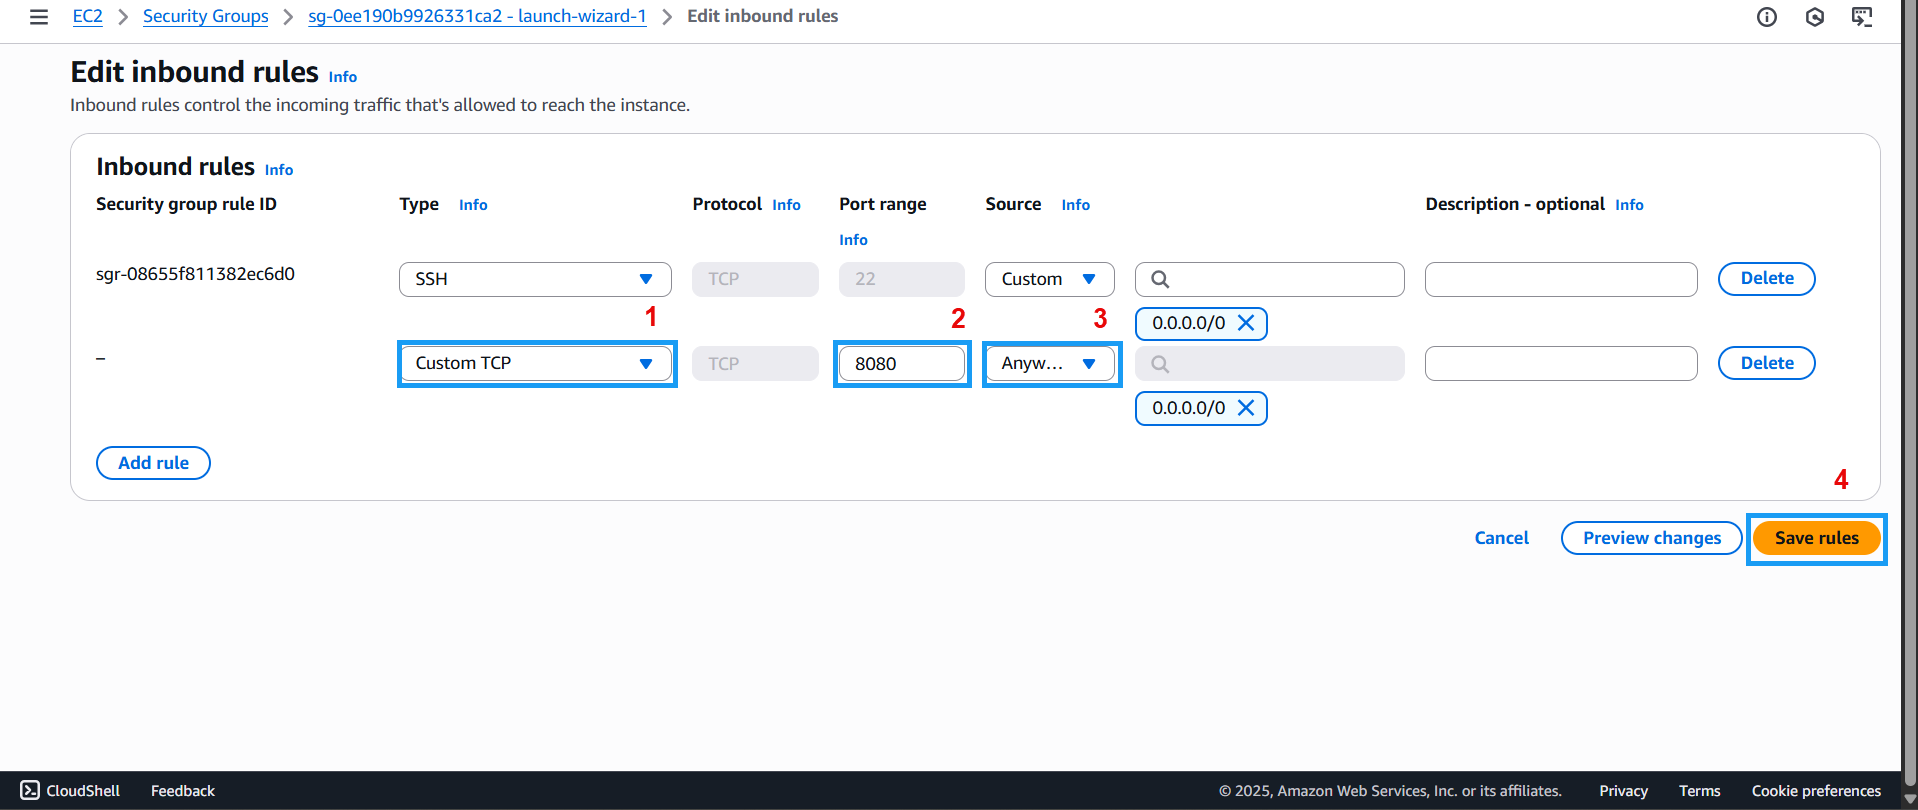
- Add a port to the inbound rules in the EC2 security group.
- Click add Rule
- Select “Custom TCP” from the rule type dropdown
- Enter port 8080 in the port range field
- Set source to “Anywhere” (0.0.0.0/0 for IPv4)
- Click “Save rules” to apply the changes
Congratulations! You’ve completed deploying the E-Commerce Full-Stack application (specializing in electronics) on AWS. In the next section, we’ll test the deployed web application.