Create RDS
Create RDS
In this step, we will create an RDS instance.
This is a crucial step in preparing to deploy our application data to RDS in the upcoming sections.
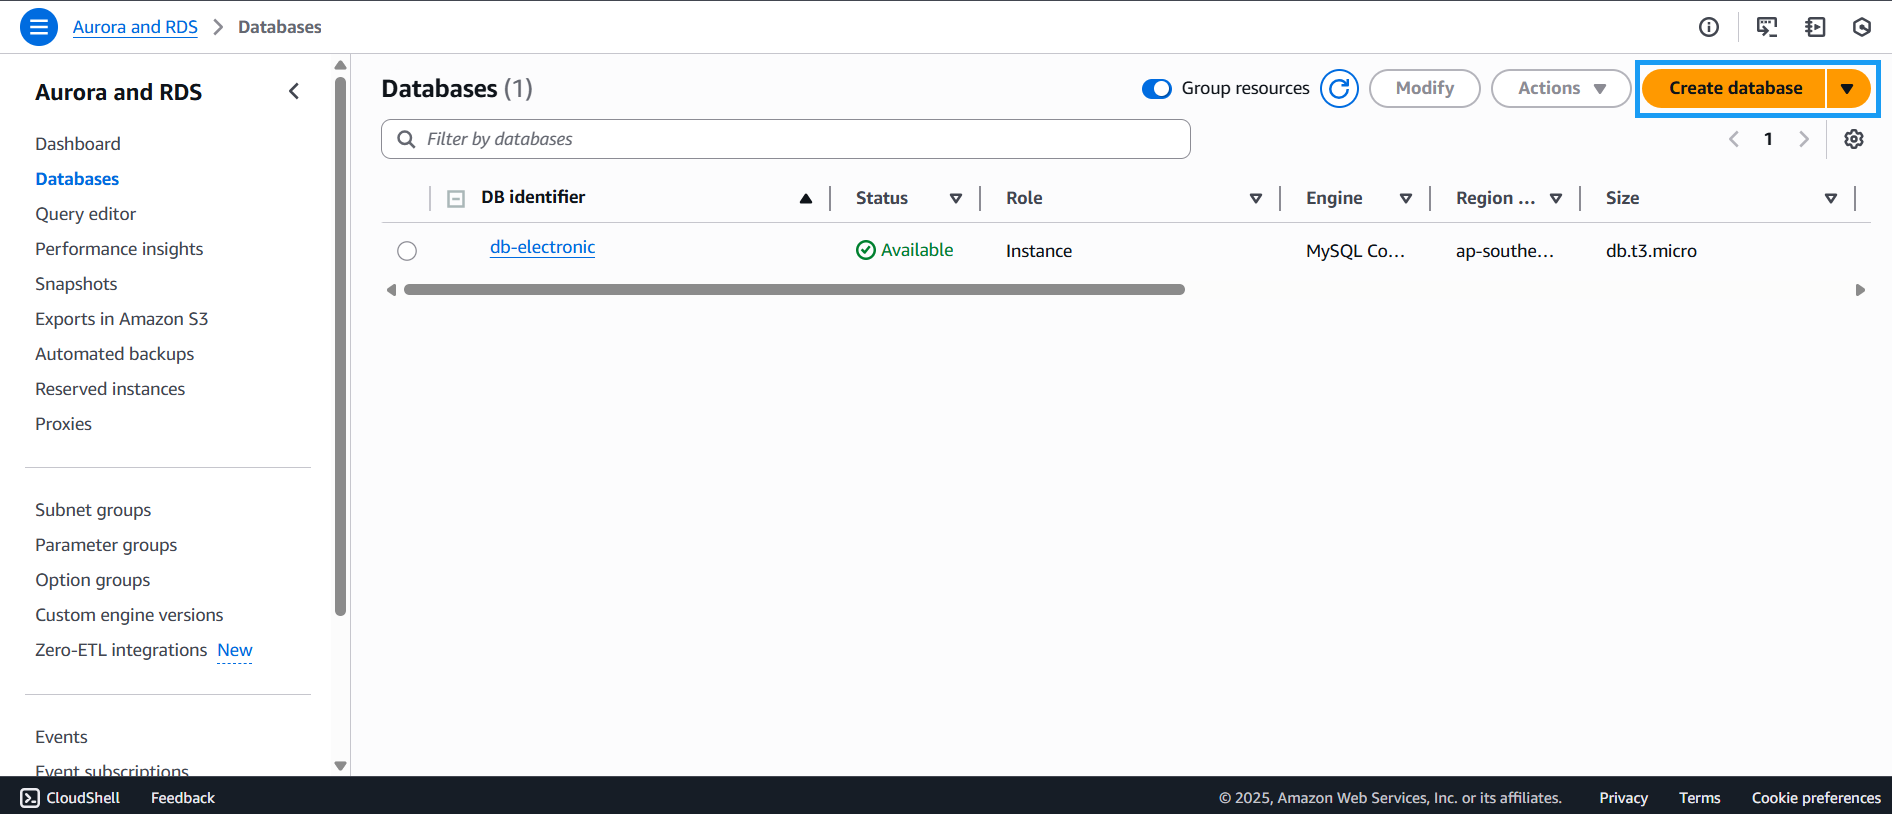
- Go to the RDS Management Console
- Click on Databases

- On the RDS dashboard, click Create database
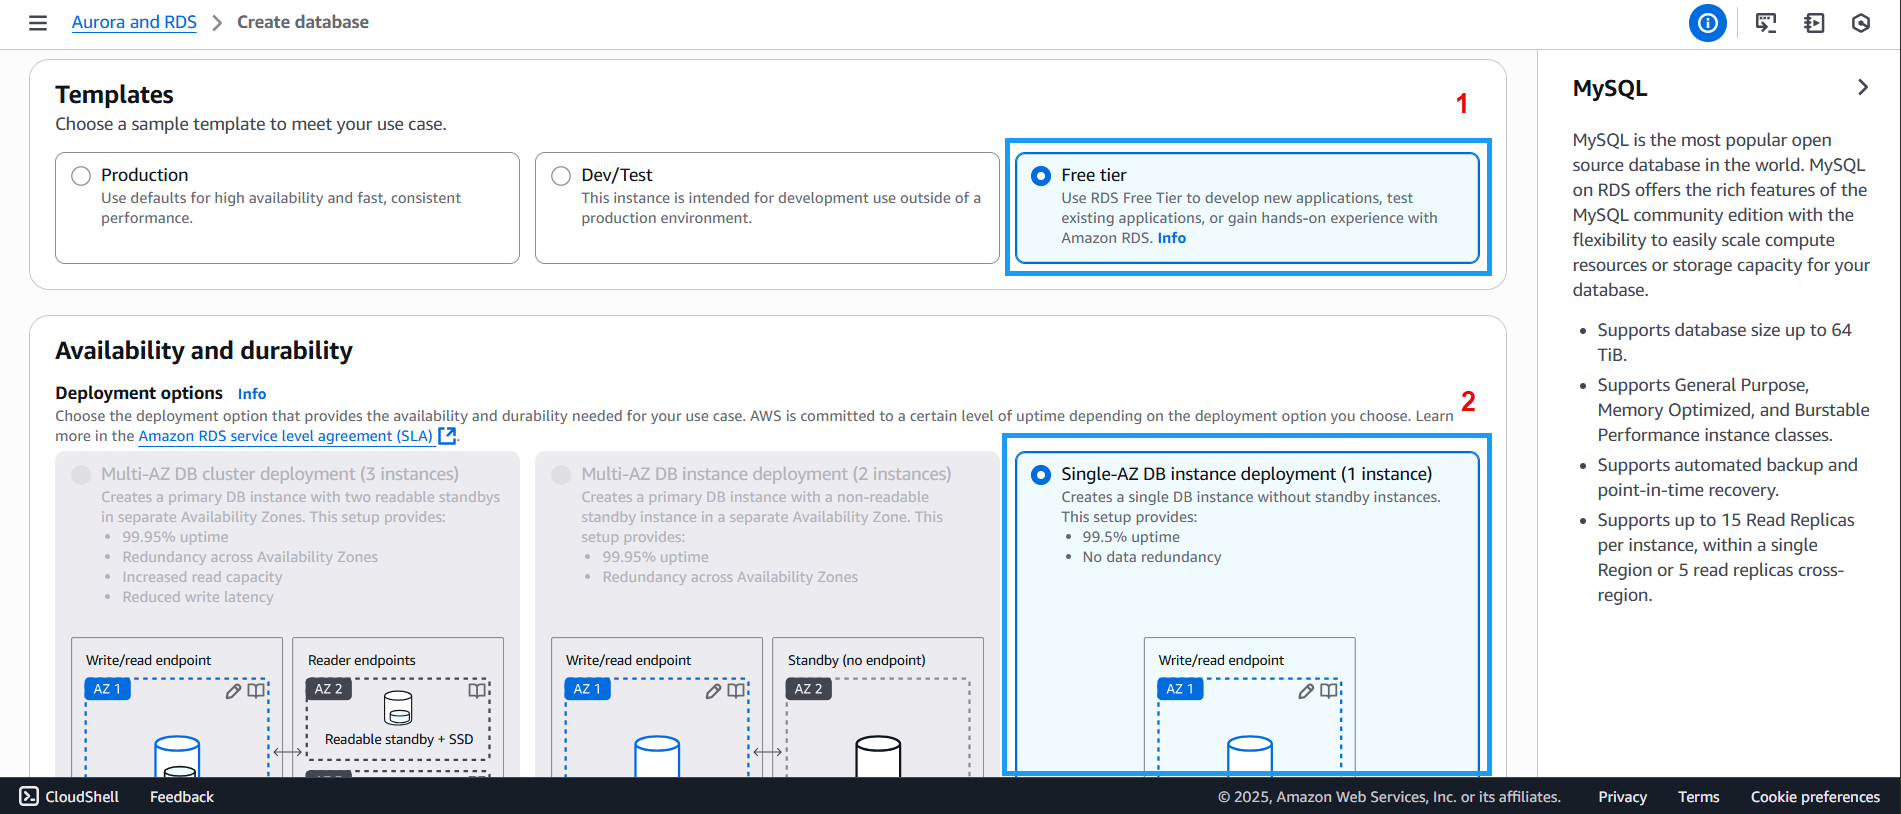
- On the Create database page:
- Under Choose a database creation method, select Standard create
- Under Engine options, choose MySQL

- Scroll down to:
- Templates: select Free tier
- Availability and durability: will be automatically set to Single-AZ DB instance deployment (1 instance)
- Scroll down to the database credentials section:
- Enter a DB instance identifier
- Set Master username to
admin - Under Credentials management, choose Self managed
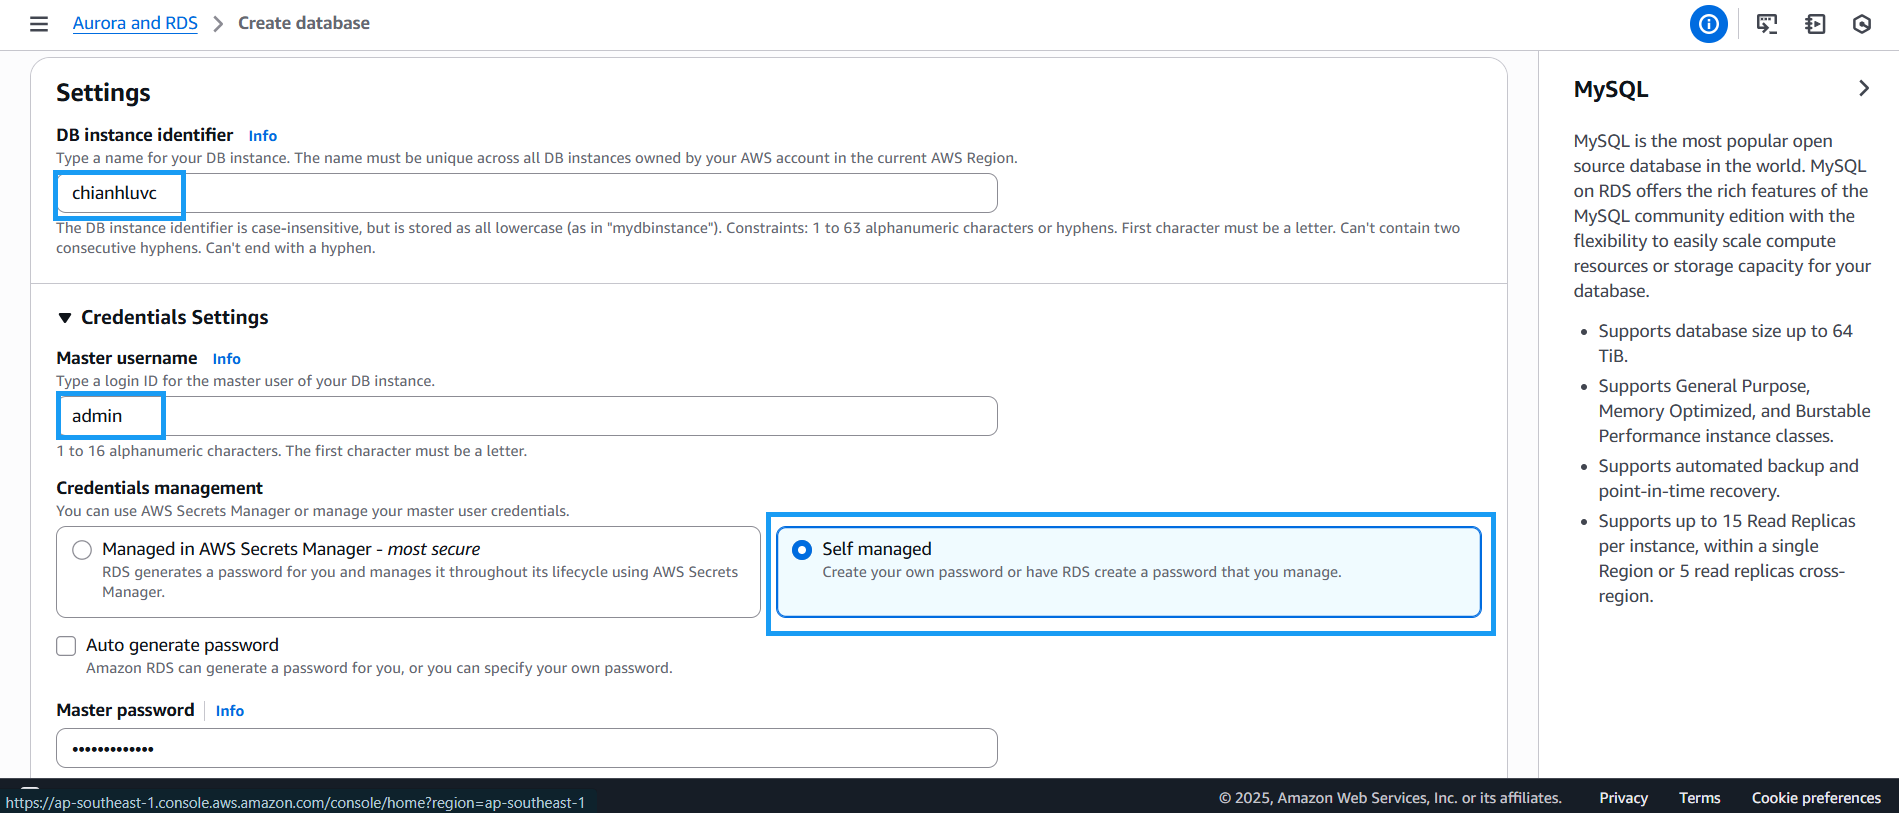
- Scroll down to the password section:
- Enter the Master password
- Re-enter it in Confirm master password

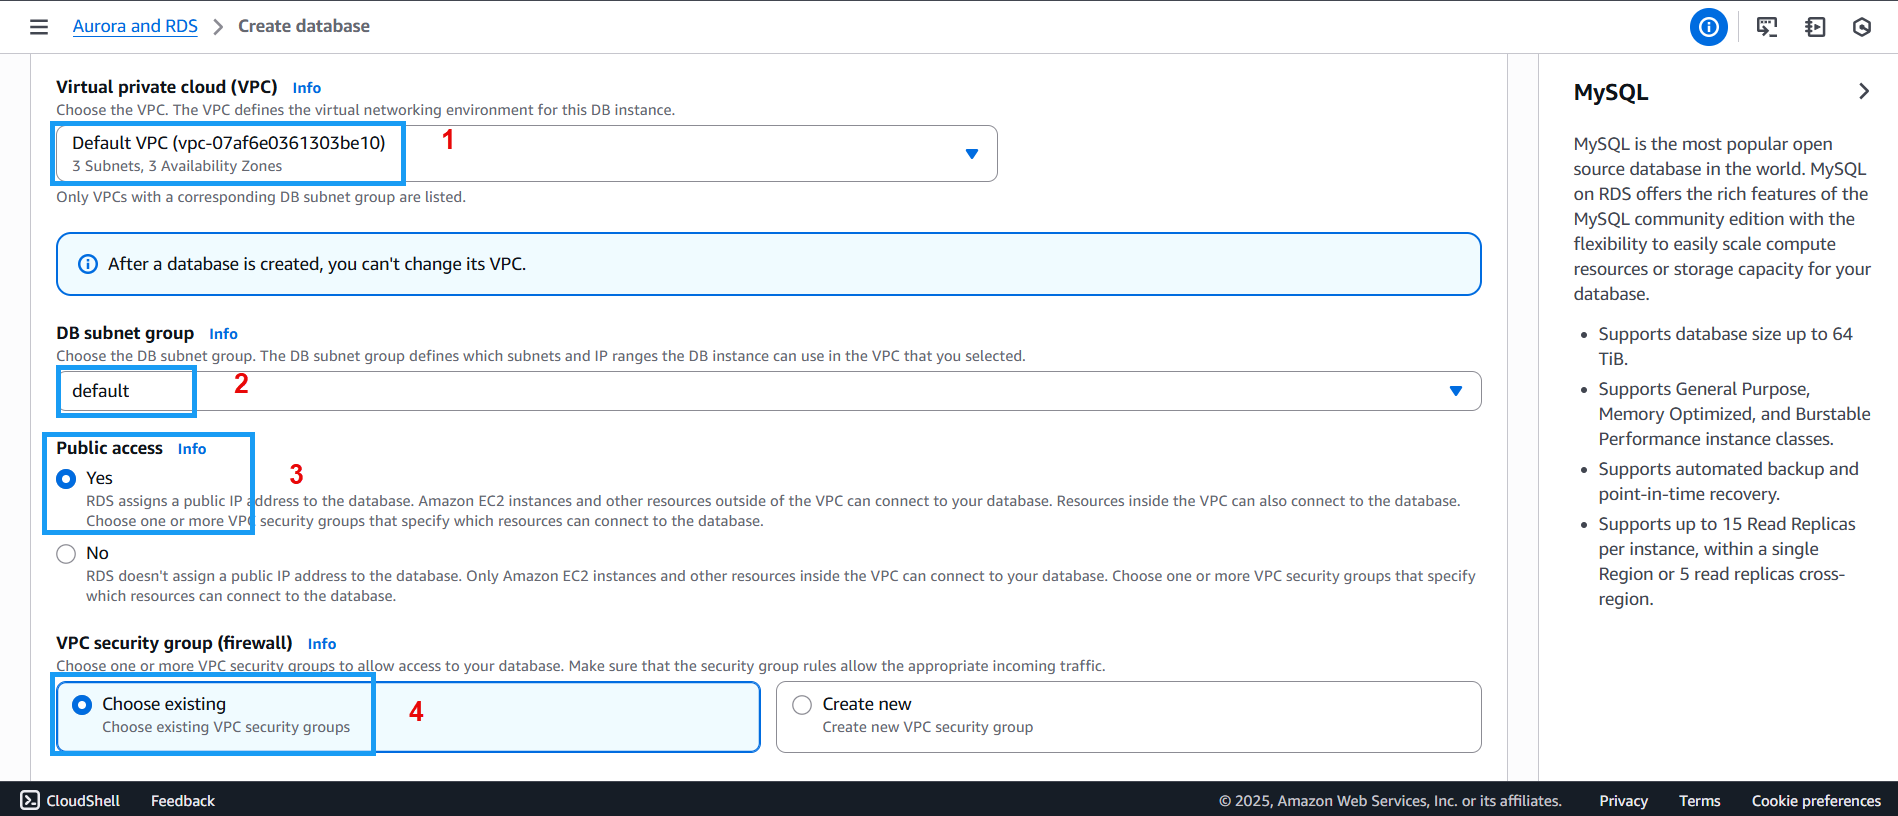
- In the Connectivity section:
- Virtual private cloud (VPC): choose Default VPC
- DB subnet group: choose default
- Public access: select Yes
- VPC security group (firewall): choose Choose existing
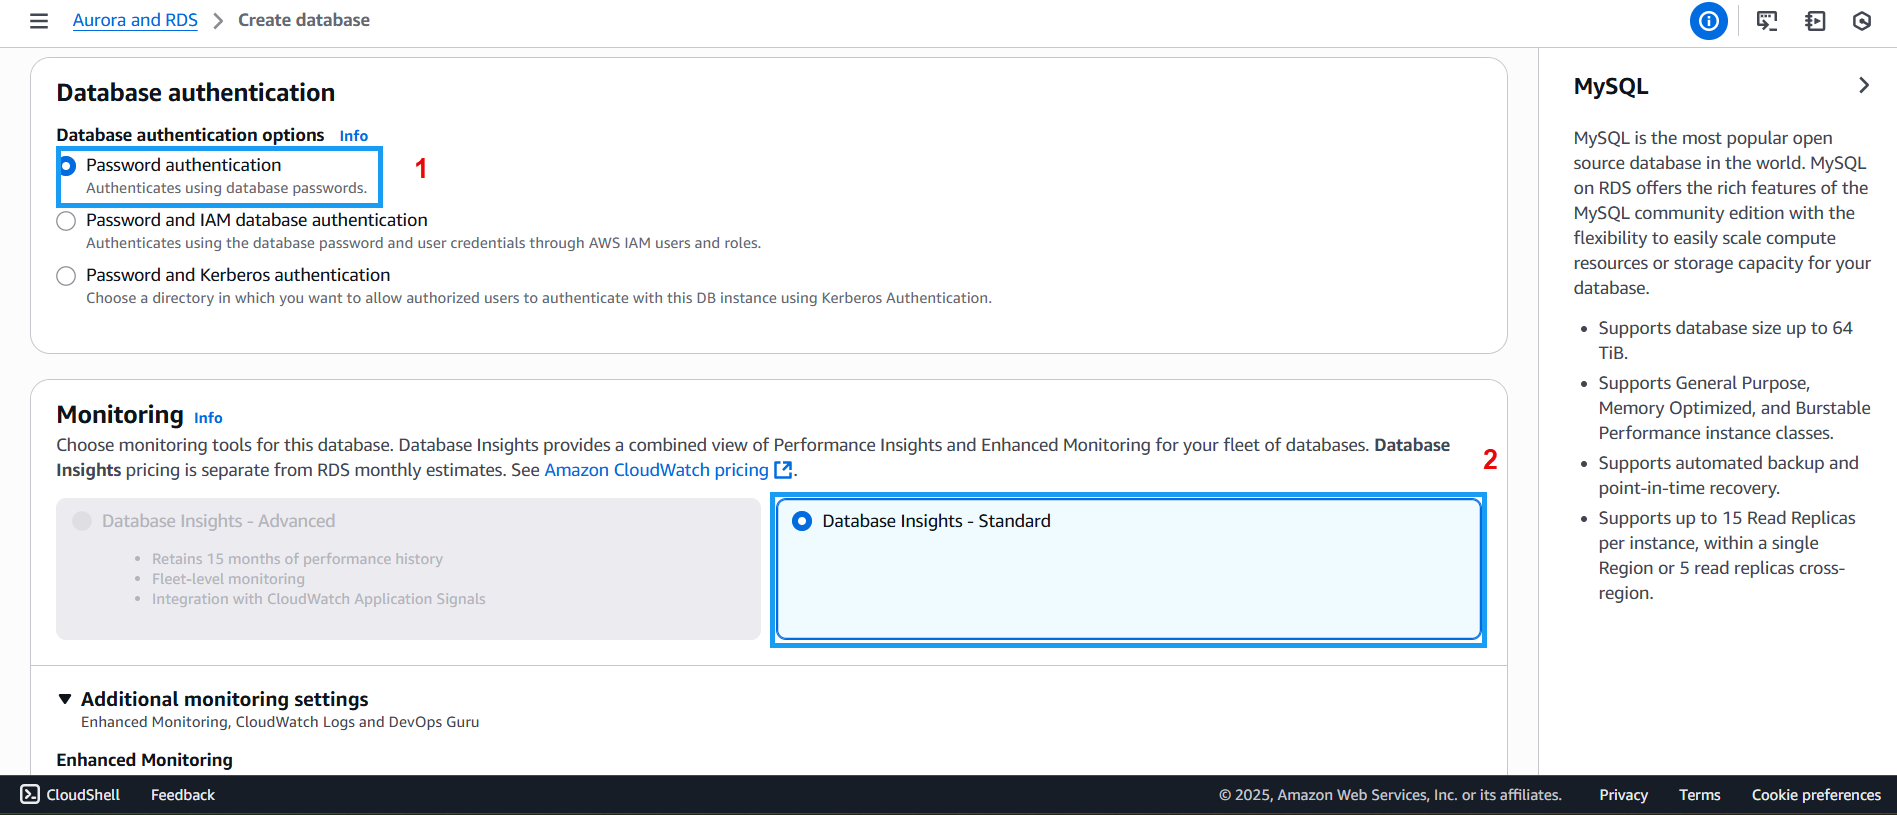
- Under Database authentication:
- Select Password authentication
- Monitoring defaults to Database Insights – Standard
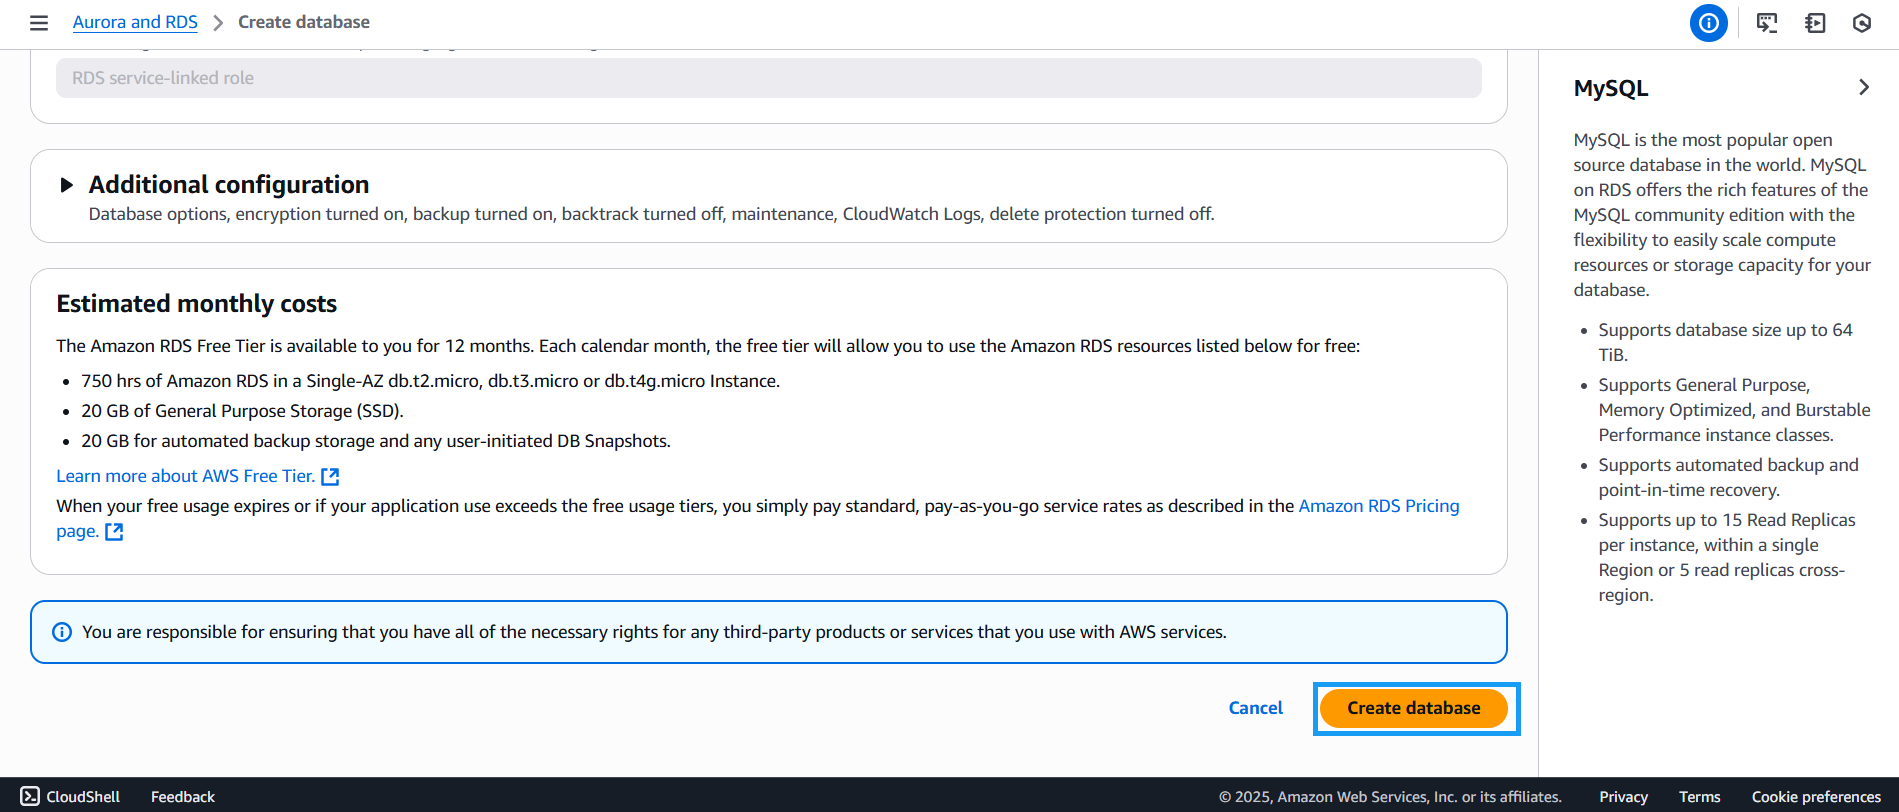
- Scroll to the bottom and click Create database
- Once created, you will see your new database listed with the status Available
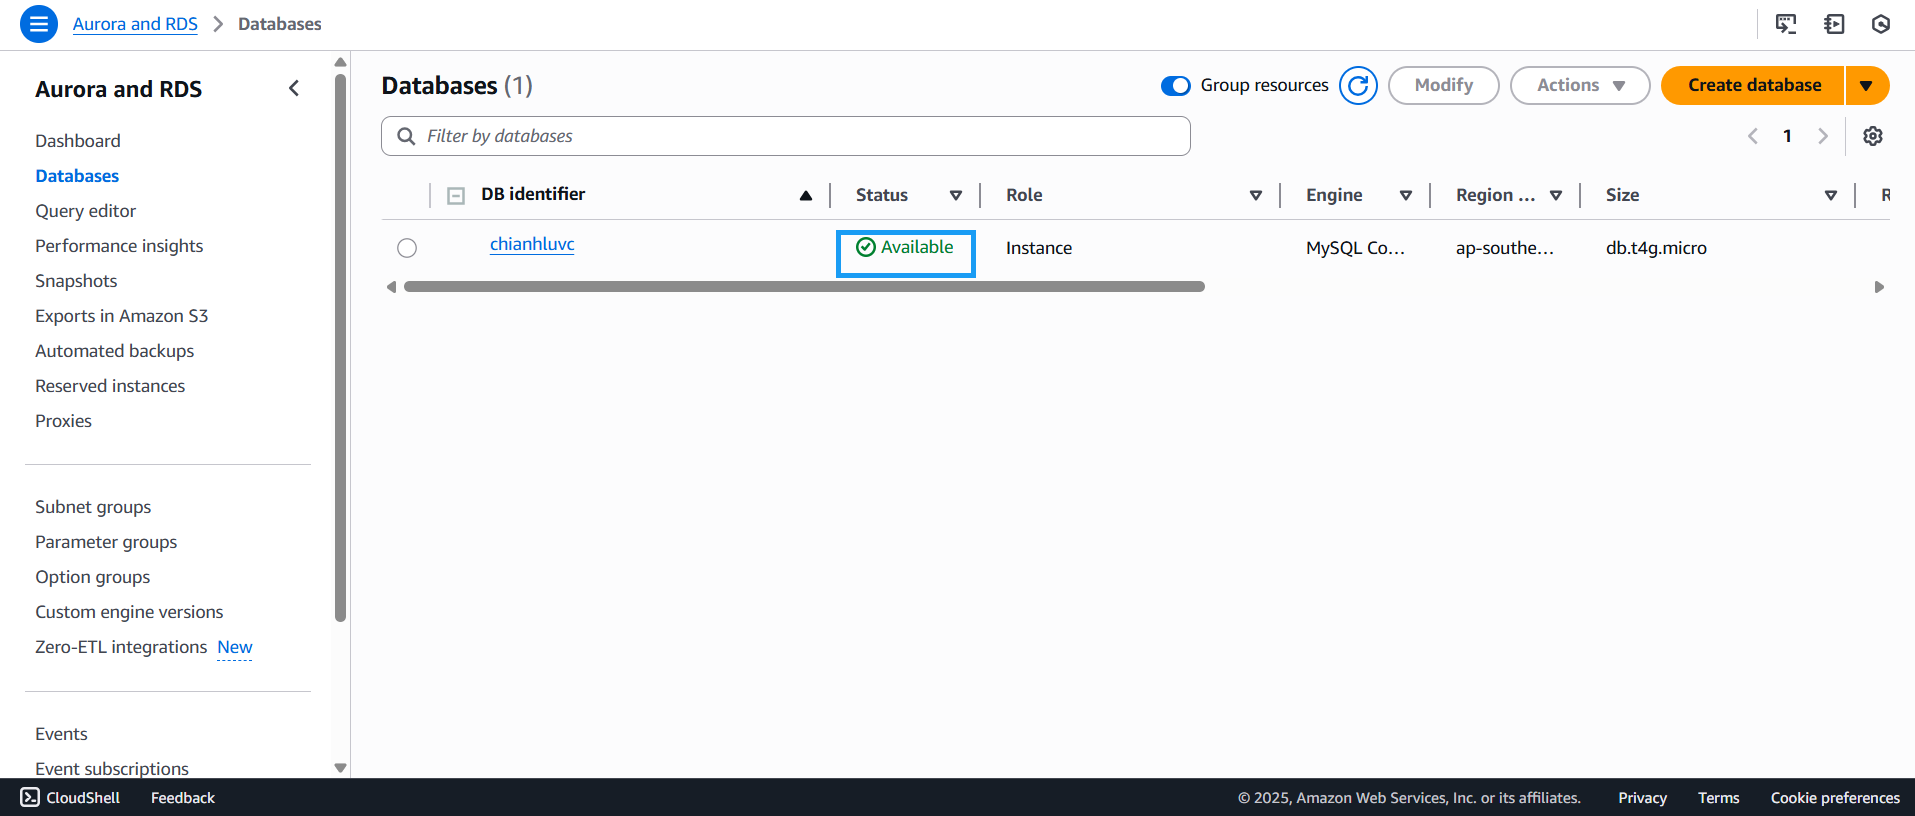
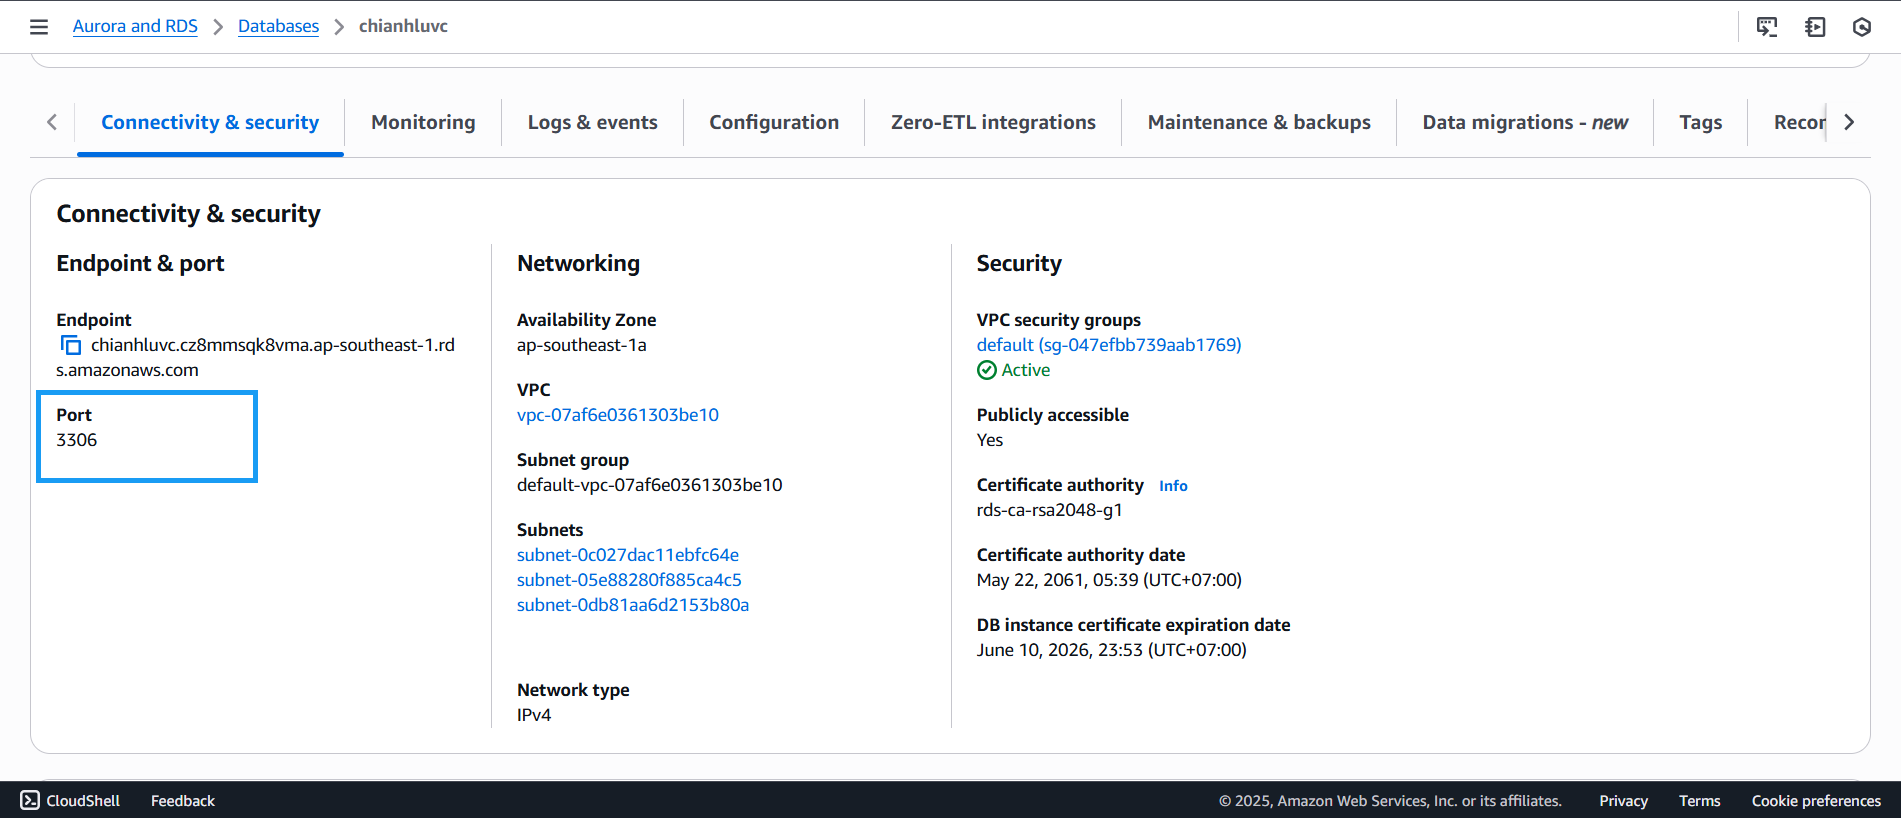
- Click on the newly created database to view its details — take note of the endpoint, which is the URL your application will use to connect
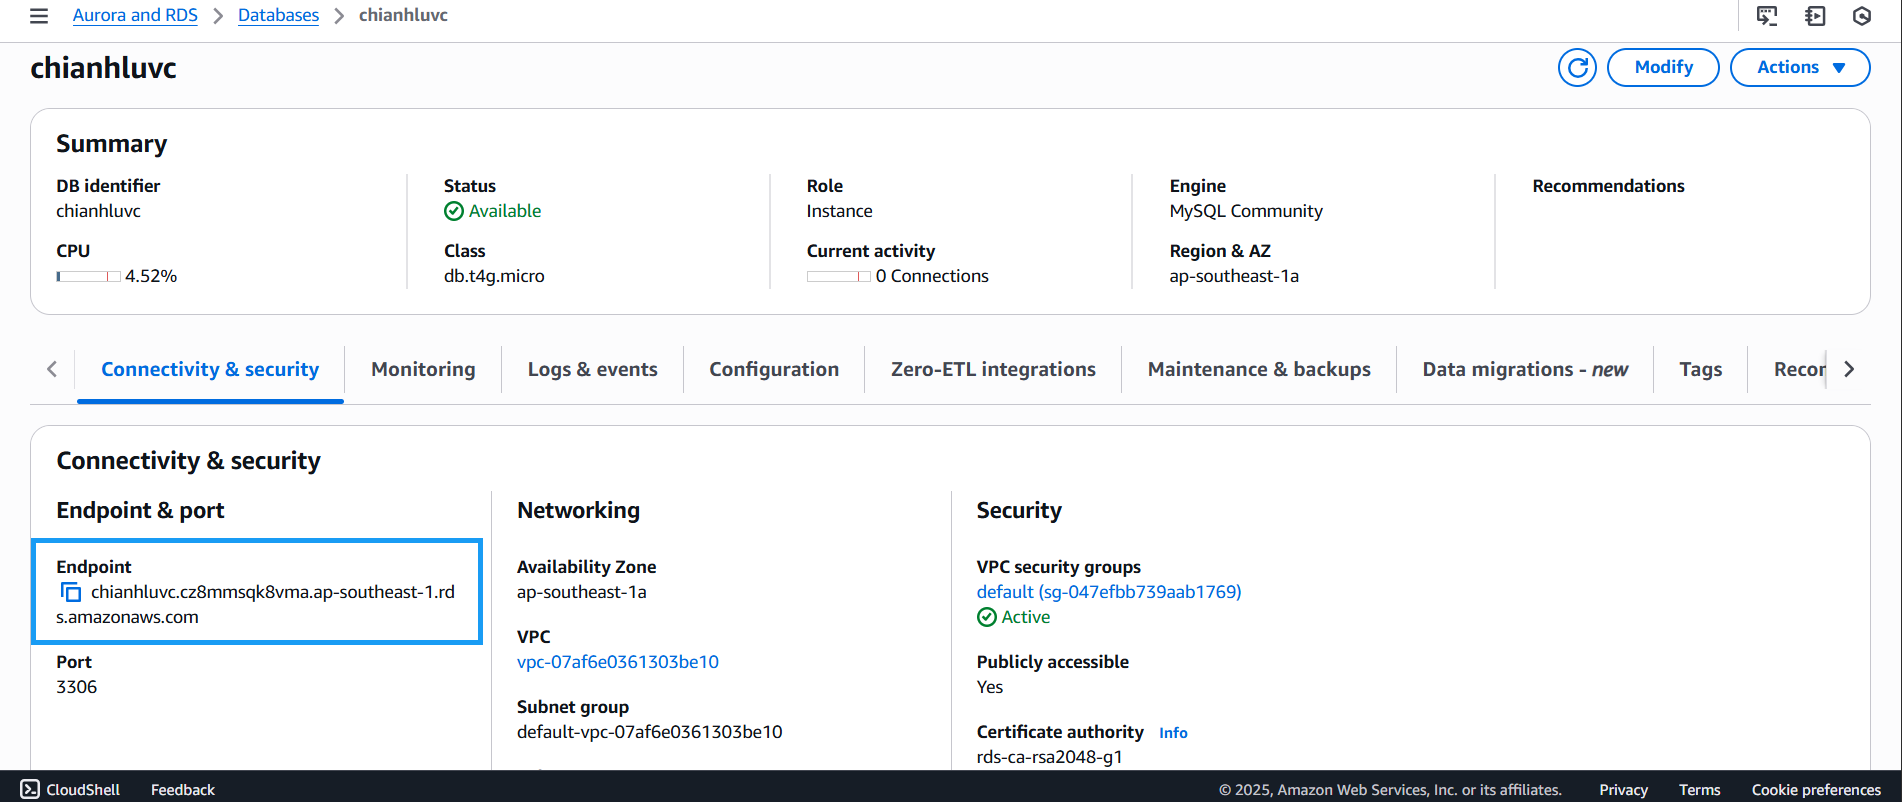
- Scroll down to Connectivity & security to see that the database runs on port 3306
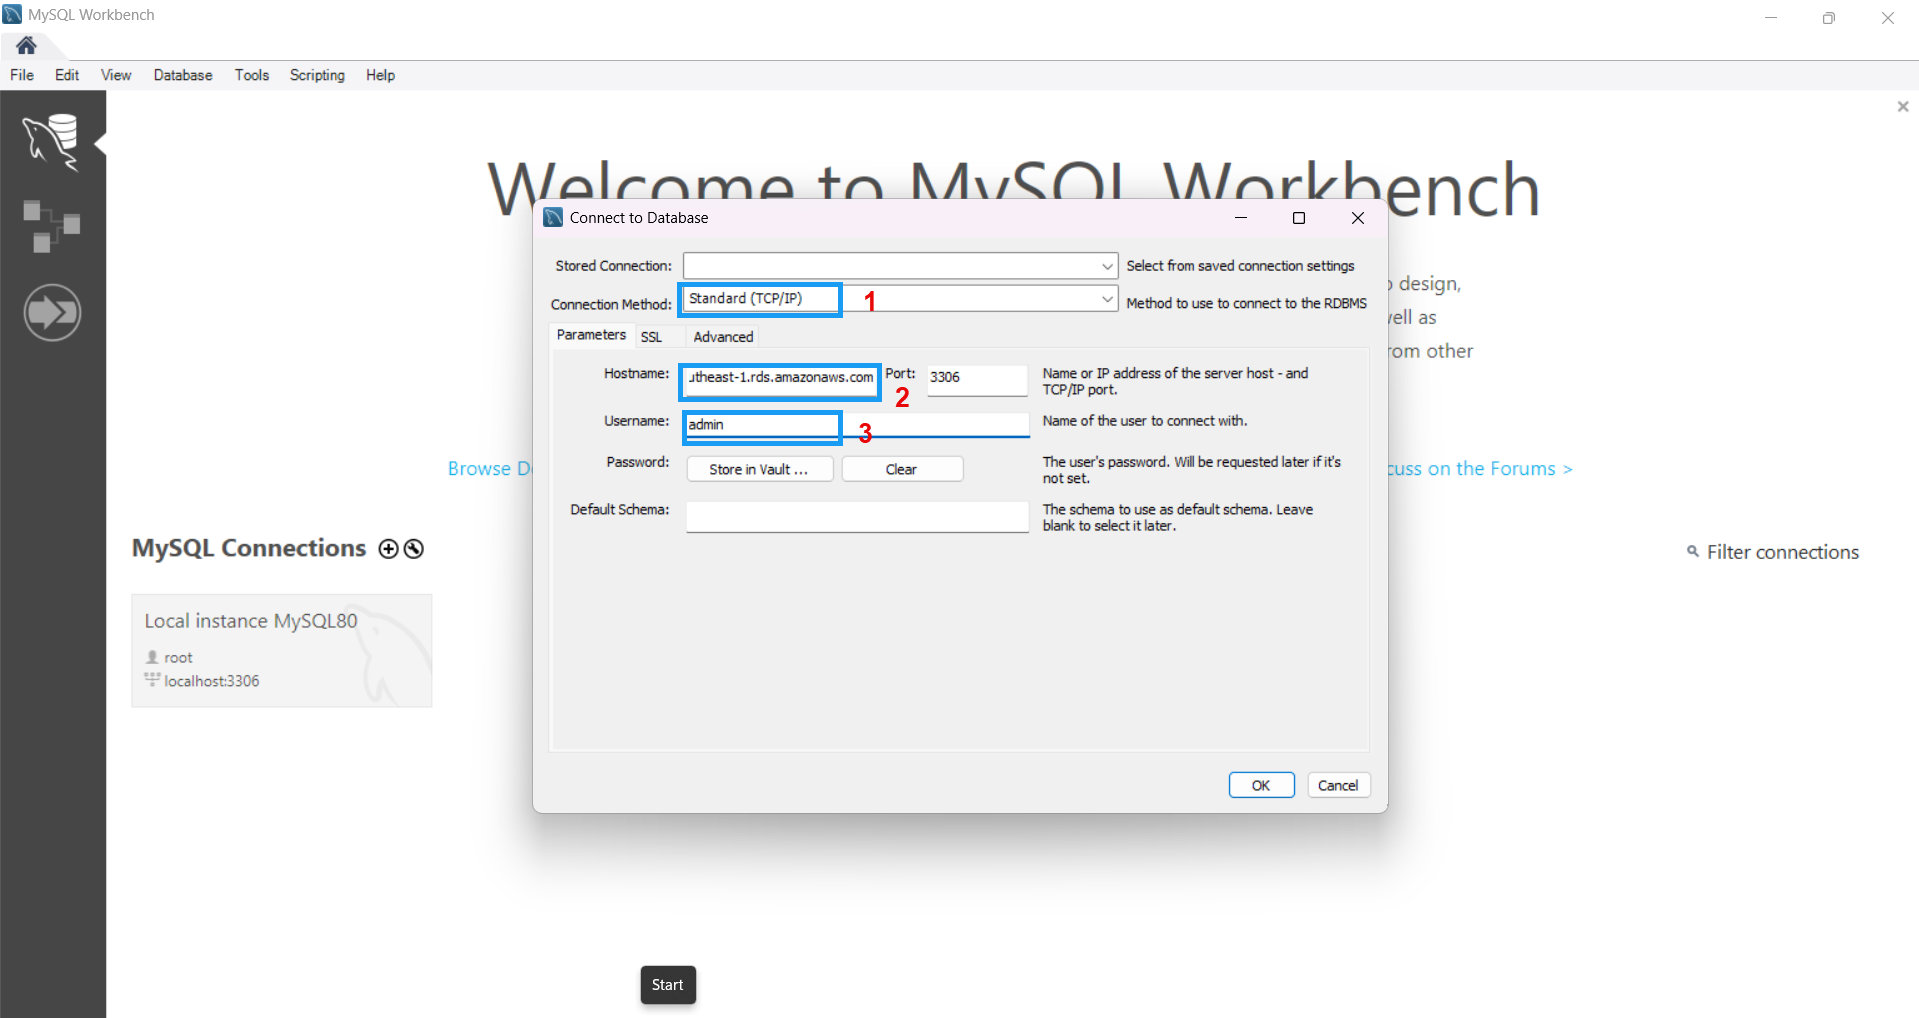
- Open MySQL Community client. You can download it here
- Click Database
- Then click Connect to Database

- In the Connect to database dialog:
- Connection Method: select Standard
- Hostname: paste the endpoint from your RDS instance
- Username: enter
admin - Click OK, then enter the master password when prompted
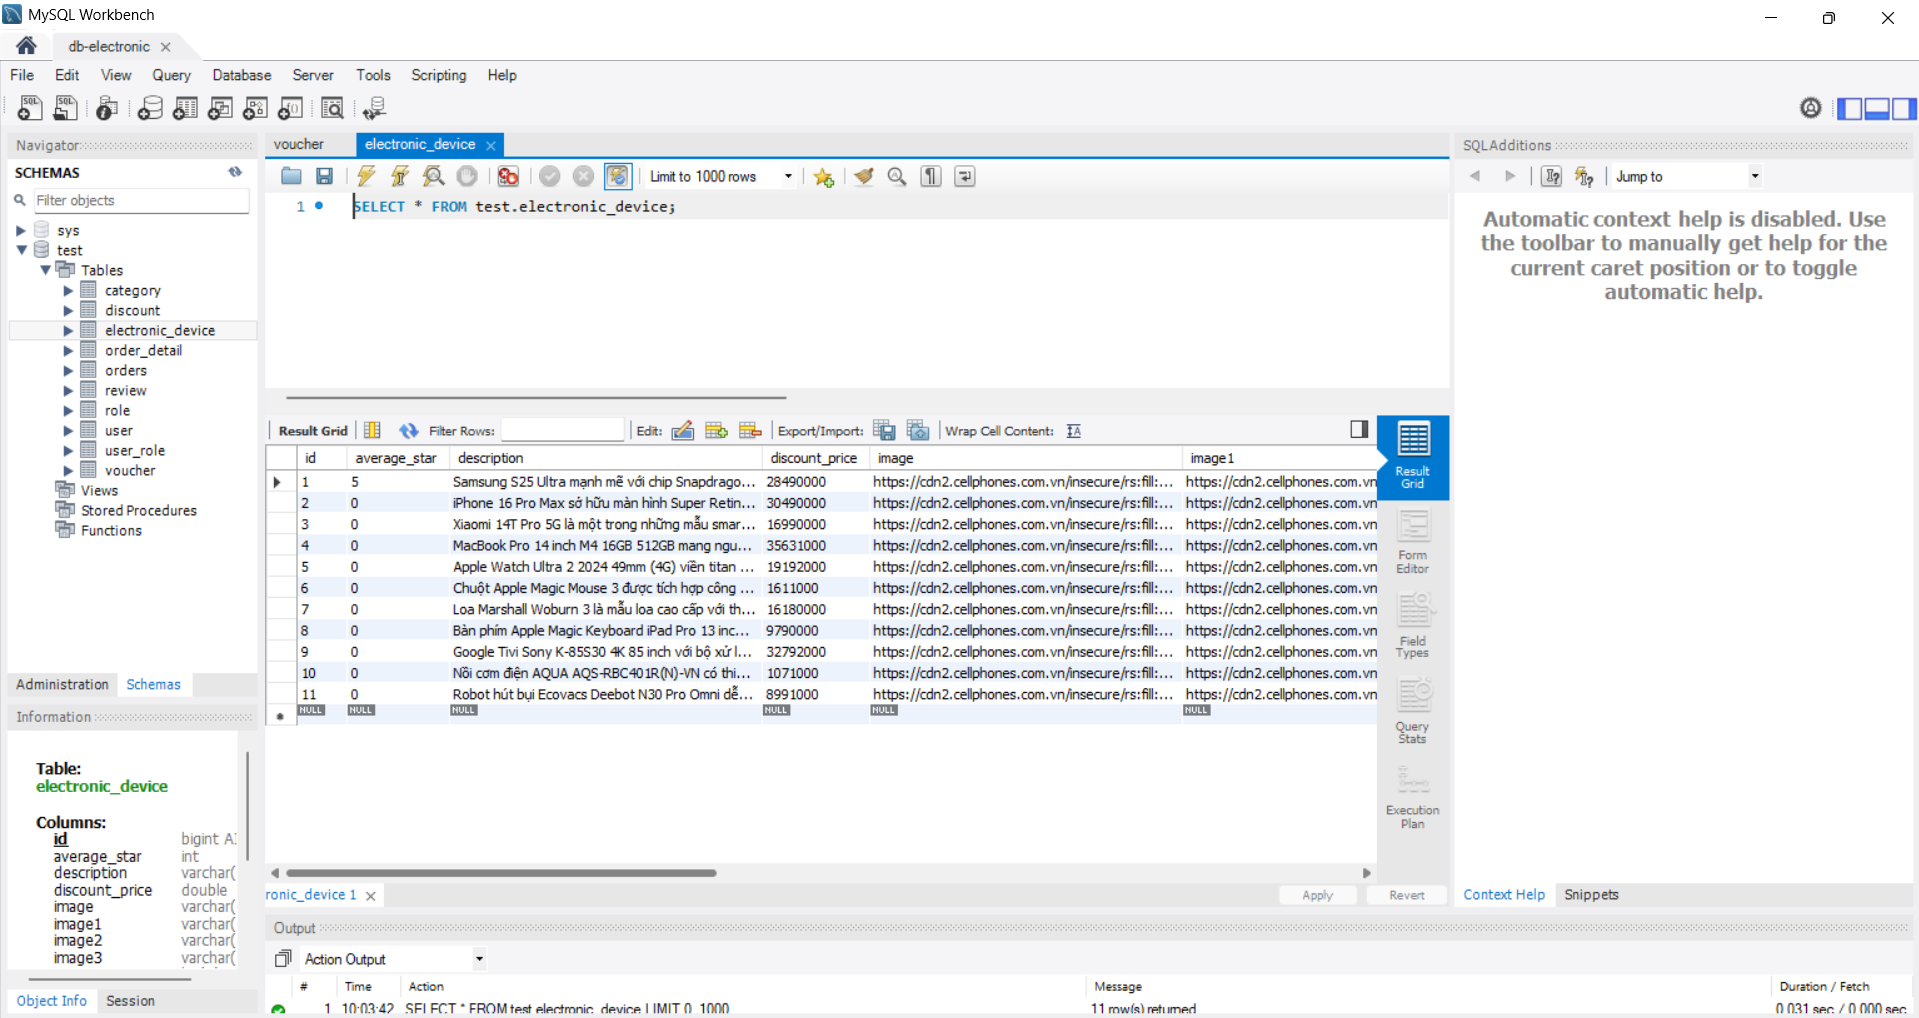
- The MySQL client interface will now show the details of your newly created database
Now that we’ve finished setting up RDS, the next step is to download the source code and package it into a .jar file.